 |
Radiosity with Blender
By Toussaint Frédéric |
 |
|
Radiosity with Blender
By Toussaint Frédéric |
|
Adding textures
Select the walls and shift back
into the material buttons (F5) ![]() .
You will see that the radiosity solution appears like a new material
; the fact it is blue indicates it is shared by other objects (which perfectly
makes sense because we separated them). Press the button showed by
the red arrow
.
You will see that the radiosity solution appears like a new material
; the fact it is blue indicates it is shared by other objects (which perfectly
makes sense because we separated them). Press the button showed by
the red arrow ![]() to make the material single (say yes to "Single User") or the modification
we will make will appear on all the other object taken into account in
the radiosity solution. Delete all specularity (Spec) and
increase the reflection (Ref) to 0.930, then set all
the RGB color component to 0.890 in order to get a wall slighty
more white than the original default grey. We will add some sort of noise
to the walls : shift to the texture buttons (F6)
to make the material single (say yes to "Single User") or the modification
we will make will appear on all the other object taken into account in
the radiosity solution. Delete all specularity (Spec) and
increase the reflection (Ref) to 0.930, then set all
the RGB color component to 0.890 in order to get a wall slighty
more white than the original default grey. We will add some sort of noise
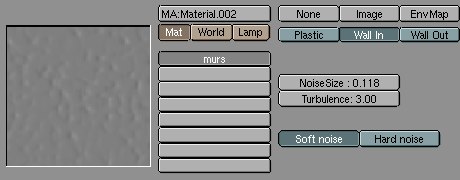
to the walls : shift to the texture buttons (F6) ![]() and add a new texture (let's call it walls, or 'murs' in french). Select
the stucci texture type and give it all the following parameters
:
and add a new texture (let's call it walls, or 'murs' in french). Select
the stucci texture type and give it all the following parameters
:
Get back into the material buttons (F5) ![]() ,
turn off the Col button and turn on the Nor button. You can
play with the bump map intensity using the Nor slider located under these
buttons.
,
turn off the Col button and turn on the Nor button. You can
play with the bump map intensity using the Nor slider located under these
buttons.
For this material, I kept the following parameters :

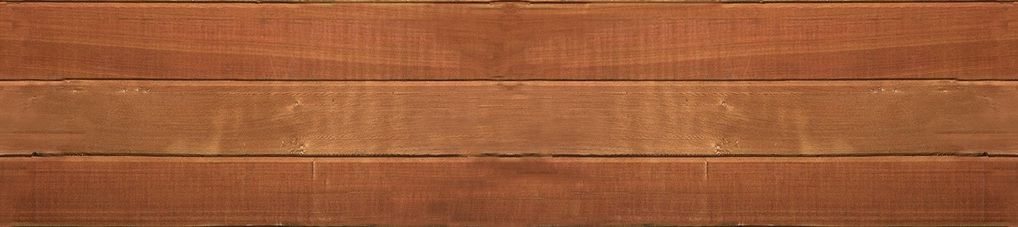
For the floor, do exactly the same, starting by making the material single, as already seen. Keep the Spec and Ref value as are. Shift to the texture buttons (F6) and add a new texture that you can name "woodfloor" (parquet in french) for example. Select the picture shown below (you can download it by right clicking on it).
|
|
|