 |
Blender : Modelling with cross
sections
By Toussaint Frédéric Translated from french by Saraja Olivier |
 |
|
Blender : Modelling with cross
sections
By Toussaint Frédéric Translated from french by Saraja Olivier |
|
Select the last vertex.
Create many more of them by using the CTRL-KEY plus the left
mouse button. Locate your new vertices as shown below, but don't try
to mirror this picture exactly because we will move the vertices later
to achieve the proper result.
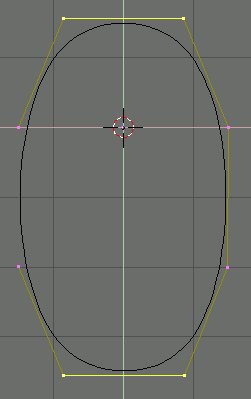 |
When all the vertices are created, you can note that your curve doesn't close. To force Blender to close it, you must press the C-KEY ("make cyclic"). To move some vertices, you just have to select them (see step 1) and press the G-KEY ("grab"). To stop moving them, press the SPACEBAR. If you want the displacement to follow a given axis, use the arrow keys of your keyboard. Take all the time needed, the shape of this curve is the main cross section of your object. Now you should have a shape
not far away from this one. You can leave the edit mode by pressing
the TAB-KEY or the The next step of this tutorial will show you how to duplicate this shape. |
|
|
|