 |
Blender : Modelling with cross
sections
By Olivier Saraja |
 |
|
Blender : Modelling with cross
sections
By Olivier Saraja |
|
 And
now, the trickiest part... And
now, the trickiest part...
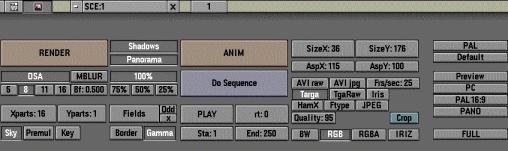
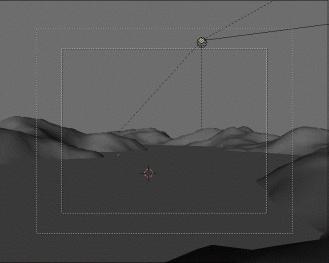
If you render now your picture (F12-KEY), the surface of the lake will be almost entirely black, because the reflection angle has been calculated from the Empty point of view, and the Empty sees only the part of the landscape under our Ob:Lake ! What make sense for us being reflected is the part of the landscape that is over the water plane ! So go in top view (NUM7-KEY) and select your landscape. Then enter the shaded view (Z-KEY). Edit (TAB-KEY) the vertices of your landscape, and select (B-KEY two times) those who are strictly under the water plane, and up to the camera. With all these vertices selected, press the P-KEY. Validate the separation. Leave the Edit mode (TAB-KEY) and select the separated part. Move it on the same layer than the lake object (the third layer) with the M-KEY, as we did before.  |
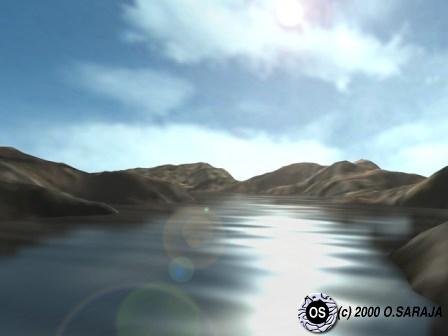
And here is the result of this tutorial ! Charming, isn't it ? The are many minor tweaking left to do, but all the basics are here.
When you'll have done this tutorial four to five times, you'll be able to render a landscape in about an hour (which is pretty quick ! it now takes half an hour to me to render such a picture). The spared time can then be spend in modelling trees, plants, animals and of course characters to fit in this landscape, can't it ?
Now it's your turn
to play ! Don't hesitate to show me your works (but don't send them by
e-mail ! I rather prefer that you give me an URL on the Internet where
I can see them).
 |
 |
|
|