 |
Blender : Modelling with cross
sections
By Olivier Saraja |
 |
|
Blender : Modelling with cross
sections
By Olivier Saraja |
|
And now, for the Blender
part of the tutorialStart a new scene using CTRL+X. Confirm ERASE ALL to
get rid of all previous scene. The plane should appear in pink, telling
that it's already selected. If not, RIGHT-BUTTON of the mouse on one of
its border should select it. Use the S-KEY. While holding the CTRL-KEY
pressed, move the mouse outward of the plane until you get the following
values : Sizex : 7.000, Sizey : 7.000 and Sizez : 7.000.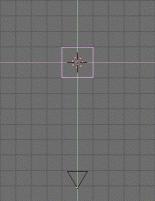
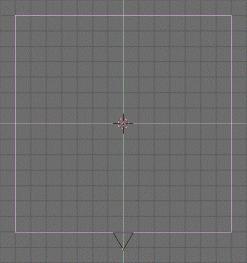
With the plane still
selected, enter the Edit Mode by pressing the TAB-KEY of your keyboard.
The four control vertices of your plane should appear in a pink color.
Press the A-KEY to select them all. Now press the W-KEY to call the subdivide
mode. Choose Subdivide. Do it six times and then leave the Edit Mode by
pressing the TAB-KEY again.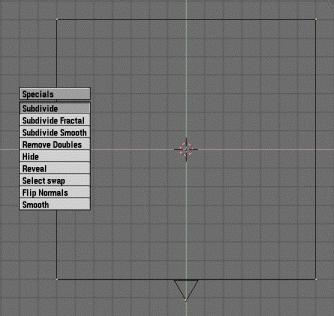
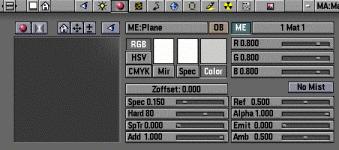
The plane comes with a standard material that you can edit with the F5-KEY (Material Buttons). Choose a Specularity (Spec) of 0.05, a light Hardness (Hard) of 80 and a Reflection (Ref) of 0.7. You can change these parameters as you wish later.
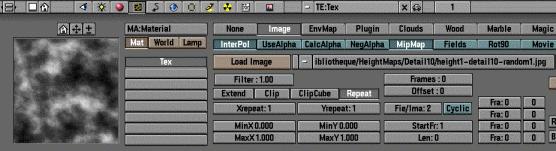
Enter the texture editor by pressing the F6-KEY (Texture Buttons). Choose Image. Click on the Load Image Button and select the picture you created sooner with The GIMP.
|
|
|