 |
MODELLING A GLASS
By Olivier Saraja |
 |
|
MODELLING A GLASS
By Olivier Saraja |
|
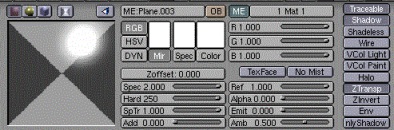
Let's take over the most challenging part, the material properties. Set immediately the size of the speculars Spec: 2.000 and their hardness Hard: 250, those parameters being the higher that Blender can allow us to this day. We now have a material that reflects a lot outter lights, very handy for simulating glass ! But we still have to make this material translucent.
To do this, lower the value of the slider Alpha: 0.050 and activate the 'Ztransp' button. At last, give some interesting spectral transparency to your glass with SpTr 1.000 and Ref 1.000.
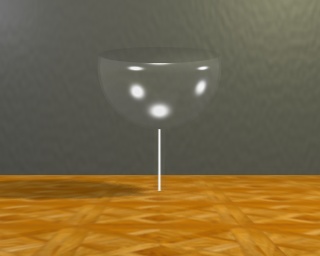
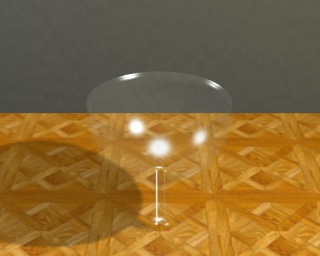
An intermediate rendering will show that the result is satisfying enough in most cases where glasses are not in the foreground nor the main subject of your scene. However, the result is very dependant to the quality of lighting and the angle of view of the scene, so feel free to do as many rendering with different viewing angles as necessary !
 .
.
Note also that our glass still don't have any especially realistic look. We
will see in the next step a very simple trick that will enhance and give
a more striking look to our material !
|
|
|