 |
MODELLING A GLASS
By Olivier Saraja |
 |
|
MODELLING A GLASS
By Olivier Saraja |
|
Start a new session by reinitializing Blender (CTRL+X). The default
plane, selected and appearing in pink, will symbolize the table on which
our glass will lay upon. In the top view (NUM-7), resize the plane
until it gets around five times its actuel shape (S-KEY, move the
mouse cursor while maintaining the CTRL key pressed in order to get tabulated
size increments).
Now shift into front view (NUM-1) in order to start the modelling
of the glass. We will first draw a cross-section, and we will make it spin
around a central axis in order to get, by vertices duplication, the whole
shape of the glass.
We start by adding a mesh plane (SPACE>ADD>MESH>Plane). We now
select all the vertices of the mesh (A-KEY) and delete them (X-KEY).
We now add, by hand and at the exact locations that interest us, the vertices
that will build our cross-section. To do this, we will keep pressed
the SHIFT and CTRL keys, and we will click with the left
mouse button. New vertices will appear where you pressed the mouse button,
linked by a edge to the previous vertex. You can now close your cross-section
by unselecting all the vertices (A-KEY as many times as necessary)
and by selecting (B-KEY) the two vertices to close. Once done, press
the F-KEY to close the section.
You now have a general cross-section, and you can reorder its vertices
by moving them in more accurate location with the G-KEY.
Once finished, you should have a cross-section looking like this one.
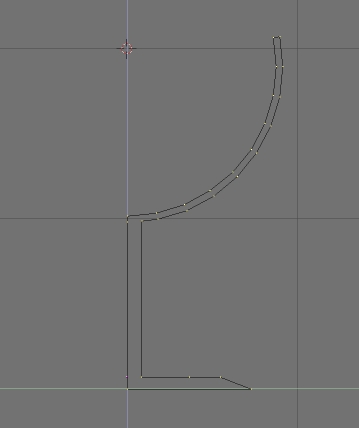
Place the cursor as indicated on the previous picture, in order to specify
to Blender the location of the spinning axis. If needed, press SHIFT-S
and select 'SNAP Curs -> Grid'.
|
|
|