 |
MATERIALS WITHIN BLENDER
By Olivier Saraja |
 |
|
MATERIALS WITHIN BLENDER
By Olivier Saraja |
|
Introduction - Color
- Speculars - Mapping
- Channels![]()
T h e C o l o r :
It is defined and altered by the sliders showed below.
Red, Green and Blue
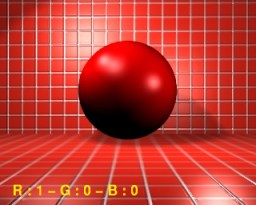
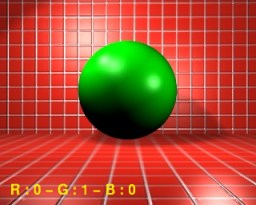
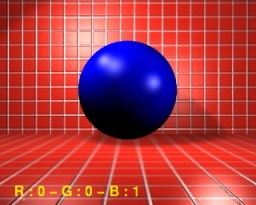
R, G and B defines the three Blender's standard color channels (respectively Red, Green and Blue). The default value for each of these three colors is 0.8, which results in a light grey. You should feel free to play with each of these sliders until you get, in the previsualization little window, the color you are looking for. Here are, for example, the results for the three fundamental colors once rendered with every other material parameter set to its default.
 .
. .
.
It is important to note at this stage that if you use a picture as a texture map to your sphere, it is the R, G and B components from the picture that will be used to color your sphere, according to mapping rules we will talk about later. But even if you use a texture to color your sphere, it is highly recommended to give your material a R, G, B color for the following points :
- in solid preview (ALT+Z) of your scene, you can more easily judge how the objects interacts with others if they are of different colors ;
- while using the Radiosity module, it's the fundamental R, G, B color that is taken in account by the radiosity engine, and not the components given by the mapped texture ;
- while rendering intermediary environment maps (EnvMap), it is useful to give an object a color very close to the one of the same object with its final texture, because of the limitations of this kind of maps within Blender (the objects with an EnvMap texture don't reflect each other, so the reflects show flaws as annoying as the lack of objects on the map ; we will discuss later how to painlessly bypass this limitation).
Reflection
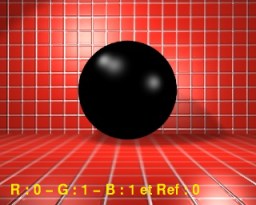
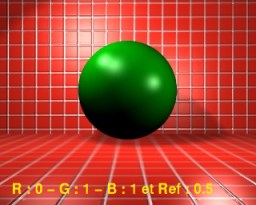
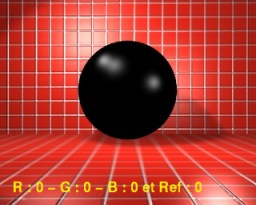
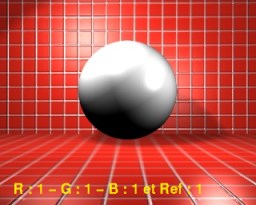
This parameter (Ref) defines how much light is returned by the material. To a given R, G, B color, a low Ref value gives a dark color, and a high one a light color. Thus, we can easily obtain the following colors :
 .
. .
.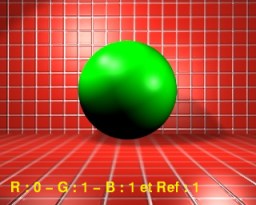
Here we come with a useful property to know : to achieve a true black ball (R:0, G:0 and B:0), you should set Ref to 0. Of course, to achieve a true white ball, (R:1, G:1, B:1), Ref should be set to 1. The later case is particularly useful when you try to model a white paper sheet or a snowy landscape and, without taking this fact into account, you will get, at best, a pale grey instead of a pure white.
 .
.
Alpha
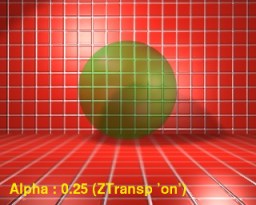
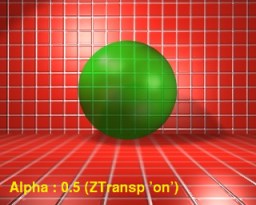
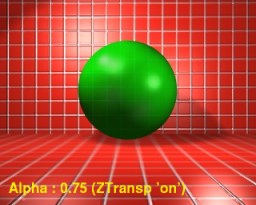
This parameter (Alpha) defines the color's opacity, e.g. how much the color of the objects located behind will be seen through the material. The best results are achieved when the "ZTransp" button is activated.
 .
. .
.
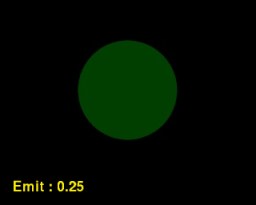
Emittence
This parameter (Emit) simulates a luminescent material, e.g. a material that can shine in the dark. This means that in absolute darkness, our material, with a Emit : 0, is fully invisible, while with a Emit : 1 il will be visible as well as in full daylight ! The two following pictures have been rendered without any light sources.
 .
.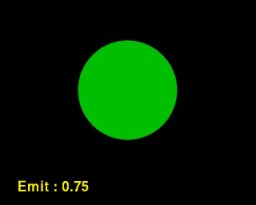
The two same pictures, but with a slight lighting (the Energies of the lamps and spots have been set to 0.2).
 .
.
You should note that this parameter is not sufficient to cast light
on other objects ! This is possible only through the use of the Radiosity
engine which is the only actual way to take into account the luminosity
emitted by objects other than lamps in Blender.
|
|
|