![]() Choose
→ from the main menu to
launch digiKam. The 1st time
you are asked to provide a folder to store pictures into. You
can accept the default
Choose
→ from the main menu to
launch digiKam. The 1st time
you are asked to provide a folder to store pictures into. You
can accept the default
/home/your_user_name/Pictures.
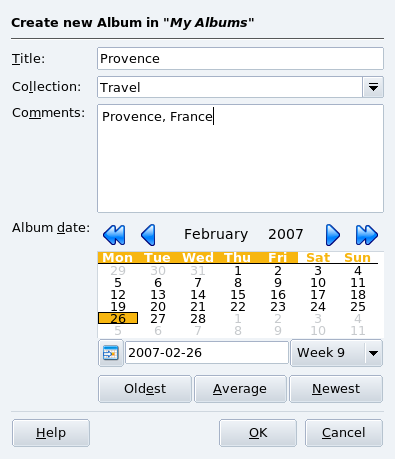
 Choose
→ from the menu and fill album
properties (see Figure 2.8, “New Album Settings”), then accept
your settings to create the album.
Choose
→ from the menu and fill album
properties (see Figure 2.8, “New Album Settings”), then accept
your settings to create the album.
 Choose
+ → from the menu and
use the standard file dialog to select the pictures you want to
add to your newly created album, then click on
.
Choose
+ → from the menu and
use the standard file dialog to select the pictures you want to
add to your newly created album, then click on
.
Double click on a picture to open the image edit window. Note that all touch-up operations may affect the quality of the picture's on-disk file. Also bear in mind that on-screen rendering is quite different from printing your digital pictures on photographic paper. So if you intend to both print and publish your pictures for online viewing, it might be wise to treat both copies differently from the beginning.
![[Tip]](images/tip.png) |
Tip |
|---|---|
Press Ctrl-Z to undo the last transformation operation. However, once you have saved the image, changes cannot be undone. |
Rotation
 Simply choose one of the entries (90º, 180º or 270º) of the
+ menu.
Simply choose one of the entries (90º, 180º or 270º) of the
+ menu.
![[Note]](images/note.png)
Brightness, Contrast and Gamma
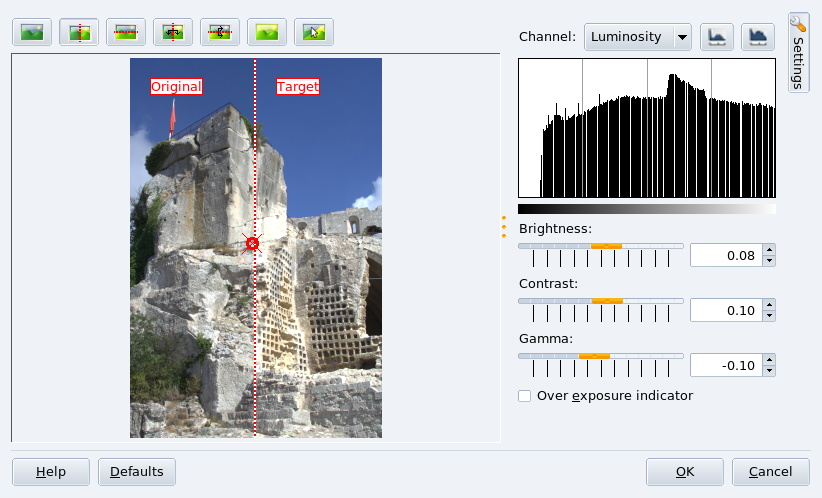
 Choose + →
from the menu and use the sliders to adjust the brightness,
contrast and gamma of the picture using the picture copy as a
guide.
Choose + →
from the menu and use the sliders to adjust the brightness,
contrast and gamma of the picture using the picture copy as a
guide.
Sharpen
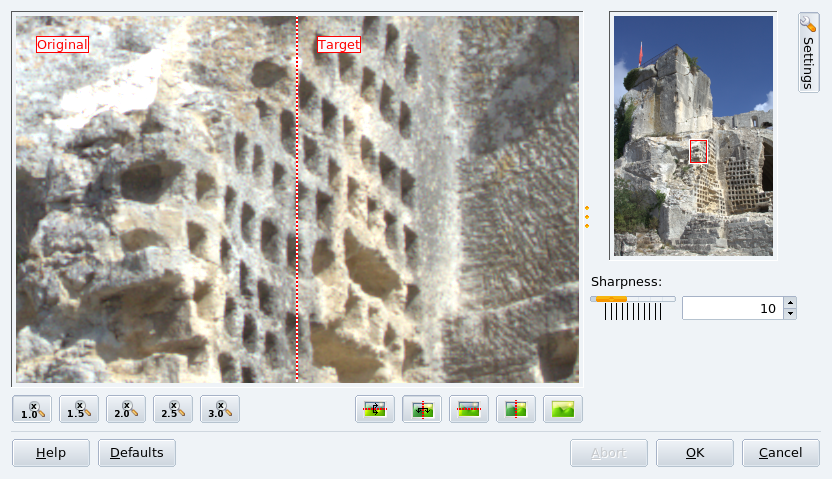
 Choose → from the menu,
drag the square to the part of the image to be used as a guide,
and use the slider to sharpen the picture.
Choose → from the menu,
drag the square to the part of the image to be used as a guide,
and use the slider to sharpen the picture.
Red-Eye Reduction
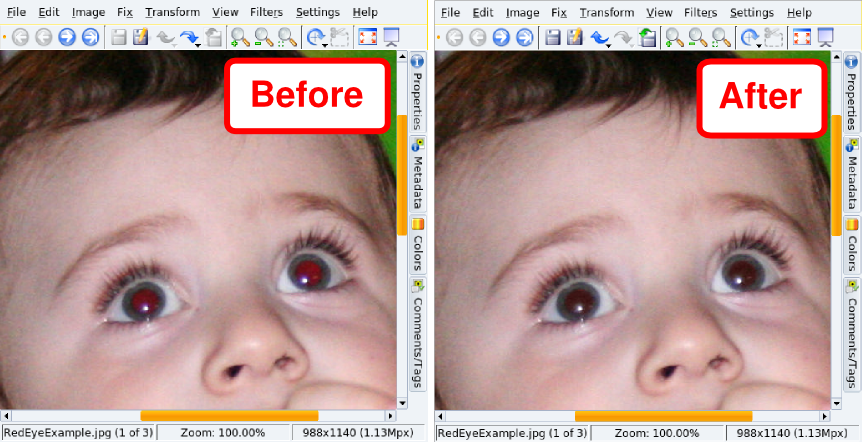
 Select the pupil of the eye to fix, choose
→ from the menu, and then
select the aggressive (only part of the eye selected) or mild
(more than the eye selected) option to reduce the red-eye flash
effect. Repeat for the other eye, if needed.
Select the pupil of the eye to fix, choose
→ from the menu, and then
select the aggressive (only part of the eye selected) or mild
(more than the eye selected) option to reduce the red-eye flash
effect. Repeat for the other eye, if needed.
Image Resizing and Cropping
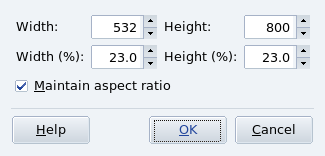
 Multi-megapixel images are excellent for
photographic paper print-ups, but are far from adequate for
e-mailing or publishing on the web. Choose
→ from the menu,
then select the desired size, either in pixels or in percentage,
and whether or not to keep (recommended) the aspect ratio.
Multi-megapixel images are excellent for
photographic paper print-ups, but are far from adequate for
e-mailing or publishing on the web. Choose
→ from the menu,
then select the desired size, either in pixels or in percentage,
and whether or not to keep (recommended) the aspect ratio.
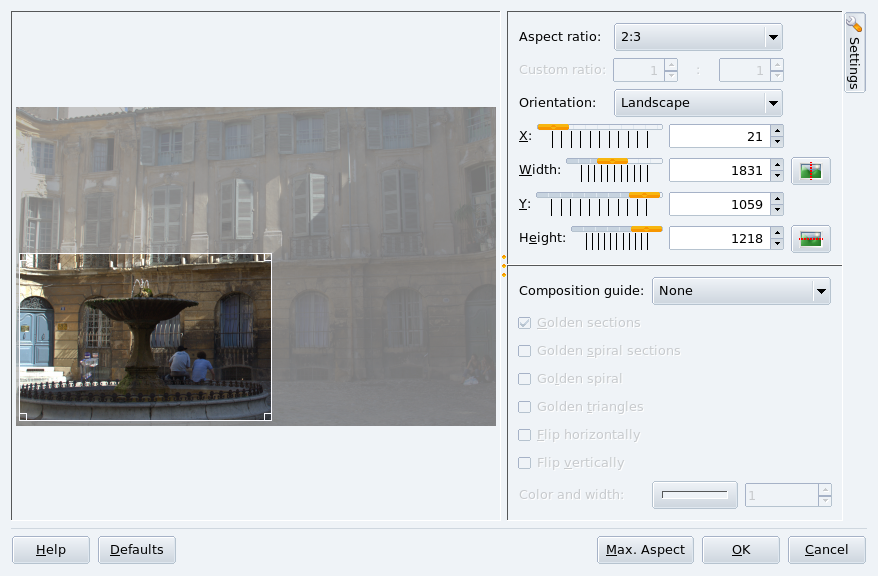
 You can also crop an image to a desired size while
keeping the aspect ratio. Choose
→ from the menu, drag the
square to frame the part of the image you are interested on and
select the aspect ratio, orientation, width and height (one
follows the other according to the aspect ratio
selected).
You can also crop an image to a desired size while
keeping the aspect ratio. Choose
→ from the menu, drag the
square to frame the part of the image you are interested on and
select the aspect ratio, orientation, width and height (one
follows the other according to the aspect ratio
selected).