 |
Blender : Modelling clouds or
mist with Blender
By Saraja Olivier |
 |
Blender : Modelling clouds or
mist with Blender
By Saraja Olivier |
Start with a new Blender session (CTRL+X). As always, we will
start by creating the emitter of our future particles system. Select
the default plane if it is not already selected (right mouse button, it
should now appear in pink). This plane already has a default material that
we will not erase, but give it a transitory texture. Please call the Texture
Buttons (F6-KEY or ![]() )
and add an new texture (ADD NEW) by clicking on the
)
and add an new texture (ADD NEW) by clicking on the ![]() button. Pick
button. Pick ![]() without changing anything to the default parameters. Enter the edit mode
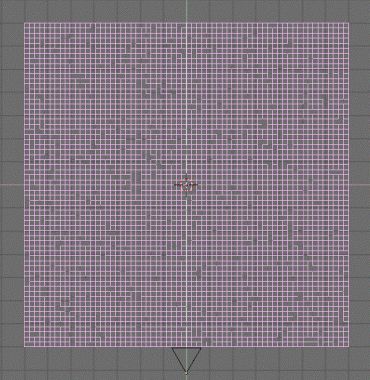
(TAB-KEY) and select all the vertices (A-KEY). Subdivide
6 times your plane (W-KEY followed by ENTER each time) in
order to get a tight mesh. Now call the Edit Buttons (F9-KEY or
without changing anything to the default parameters. Enter the edit mode
(TAB-KEY) and select all the vertices (A-KEY). Subdivide
6 times your plane (W-KEY followed by ENTER each time) in
order to get a tight mesh. Now call the Edit Buttons (F9-KEY or ![]() )
and click 2 or 3 times on the
)
and click 2 or 3 times on the ![]() button. You should note that your mesh deforms itself according to the
data given by the texture, which acts like a Heigth Map because
of the
button. You should note that your mesh deforms itself according to the
data given by the texture, which acts like a Heigth Map because
of the ![]() button : the vertices associated to a dark area of the texture has been
attributed a low height value, while those associated to a lighter area
has been attributed higher height value. We still have to resize our emitter,
far too small to be of any help. Leave the edit mode (TAB-KEY),
press the S-KEY, and while holding the CTRL-KEY, resize the
plane until you get SizeX: 7.000, SizeY: 7.000 and SizeZ:
7.000. In fact, your new plane should have almost the same surface
that your whole scene, but you will sometimes need to get an emitter 2
or 3 times greater, according to your specific needs. Note also that you
can choose to start with half a UVSphere instead of a plane, in order to
model your clouds.
button : the vertices associated to a dark area of the texture has been
attributed a low height value, while those associated to a lighter area
has been attributed higher height value. We still have to resize our emitter,
far too small to be of any help. Leave the edit mode (TAB-KEY),
press the S-KEY, and while holding the CTRL-KEY, resize the
plane until you get SizeX: 7.000, SizeY: 7.000 and SizeZ:
7.000. In fact, your new plane should have almost the same surface
that your whole scene, but you will sometimes need to get an emitter 2
or 3 times greater, according to your specific needs. Note also that you
can choose to start with half a UVSphere instead of a plane, in order to
model your clouds.

|
|