This chapter concentrates mainly on GIMP, and introduces other interesting applications you may wish to explore on your own.
The GNU Image Manipulation Program (GIMP) is a free software program challenging proprietary applications such as Adobe® Photoshop® or Corel® Painter™, allowing advanced photo editing tasks such as cropping, resizing, painting, drawing, modifying colors, etc. Its true beauty lies in its extensibility and its scripting options, which opens GIMP to full integration in programs and scripts therefore enabling it to act as a mass production image rendering application.
For normal users, GIMP will seduce you with its advanced functions for web images and formats. You can easily create animations and optimize your art for web publishing, and take advantage of GIMP's extensive photo manipulation features.
Power users, publishers and document management specialists truly benefit from GIMP through its advanced scripting capabilities and the programs' function accessibility.
GIMP, like most Free Software graphic design applications, suffers from the fact that prepress standards, such as PANTONE® Color Systems, are proprietary and closed. So for GIMP, it means that there are no usable implementations of these standards. Also, because the press world is dominated by Apple-compatible computers you will have to put in some extra effort to print professionally with GIMP, although it is feasible. Another limitation is the internal 8 bit-per-channel representation for images, which may not be sufficient for the professional digital photographer (16 bits-per-channel would be required).
GIMP includes
extensive documentation. If the gimp-help package is
installed, pressing the F1 key lets you
access a help index for the current “active” item,
and pressing Shift-F1 gives you access to contextual
help.
On the net, GIMP is a very well documented application and a lot of information is freely available. Please refer to The GIMP web site for more information about the available GIMP documentation.
Choose + → from the main menu to start GIMP.
Unlike Adobe® Photoshop®, when you open GIMP a few dialogs appear, the main one being the toolbox (see Figure 5.1, “GIMP's Main Interface”). It offers GIMP's core functions and allows you to initiate other tasks.
GIMP embraces differences. Therefore, there are usually many ways to achieve the same goal. The following is a brief description of some concepts and the way they work under GIMP.
From GIMP's main window (called the tool box), you can access the basic program options such as opening a file, creating a new file, etc.
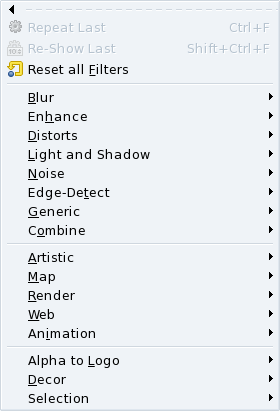
Once an image is opened or created, you can right-click in the image window and access the image's specific options such as Close, Save, Save as, Dialogs, Filters, etc. We call this the “image menu” in the following sections.
Some of the key concepts to grasp in order to truly benefit from an advanced graphic design application like GIMP are those to do with layers, formats and file modes. Roughly put, digital image editing adds a 4th dimension: layers. Images are built vertically (as are animations), and each layer has user-defined properties which determine other tasks that can be accomplished. File mode defines the inner logic of the graphic elements. Hence, an RGB image allows for different operations and capabilities that you would not have for a gray scale image. Finally, the file format also impacts on which operations can be done on that file.
If you face difficulties accomplishing any task described below, check those three elements before jumping to conclusions.
Opening a File. Choose → from the menu. Your image appears in a new window. From that window, you can access the image's menu (File, Edit, Select, etc.) or right-click as explained in Section 1.1.3.2, “Right-clicks”. Depending on the file format you want to open, you may have to answer some questions pertaining to the details of that format and its conversion. Keyboard shortcut: Ctrl-O.
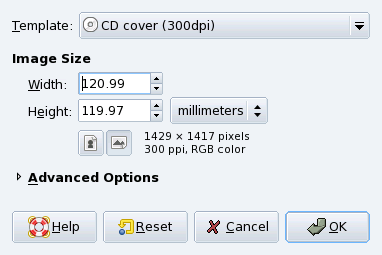
Creating a New File. Choose → from the menu. A dialog appears allowing you to determine image dimensions in different measurement units (pixels, inches, millimeters, etc.), image orientation (landscape or portrait) and some advanced options (see Figure 5.2, “Creating a New File”). You may also specify a Template from the pulldown list and have most image parameters filled for you. Once you click on the button the image is created in a new window. Keyboard shortcut: Ctrl-N.
Saving a File. The first time you Save, or when you Save as, a dialog pops up which allows you to set the name and location of your image. More importantly, this is the place to define the file type such as JPEG or PNG. Keyboard shortcut: Ctrl-S for Save, Shift-Ctrl-S for Save as.
![[Note]](images/note.png)
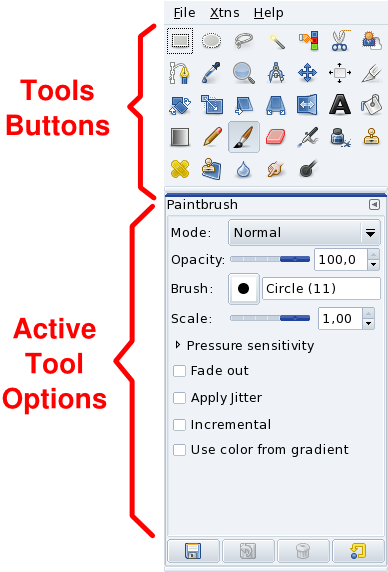
The tool box contains your basic graphic design tools. If you move your mouse over any item, its name and keyboard shortcut pops up in a help balloon. Tool options are accessible through the Active Tools Options section of the tool box. We will not detail each tool in this guide as there are already books written about GIMP to assist you. Remember that all operations take place in the current active layer.
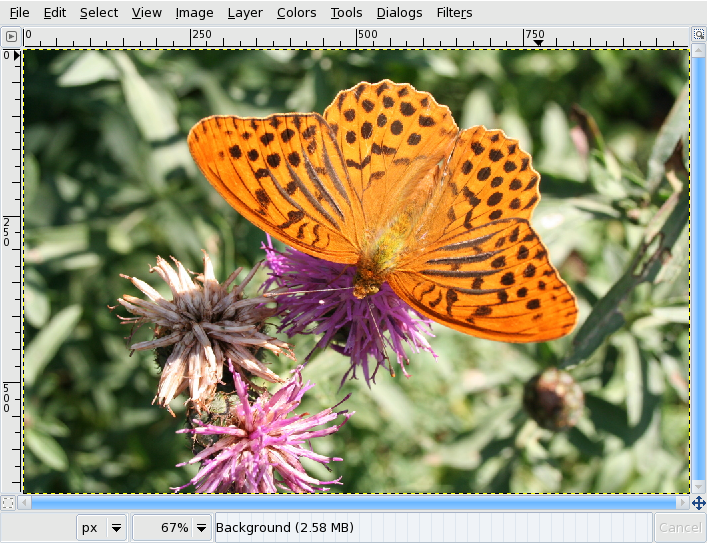
This window manages either new or opened images and it is where tools selected in the tool box may be used.
At the bottom of the image window is a numeric value shown as a percentage. This is the zoom ratio. Click on it to choose another zoom ratio. You can also press the + key to increase zoom or the - key to decrease it. Press the 1 key to set zoom to 100%.
![[Tip]](images/tip.png)
All operations can be undone and redone. You can change how far, as a minimum, you can go back in the commands “history” and how much memory to reserve for it, by choosing + from the menu, then selecting the Environment section. Please bear in mind that both settings have a large impact on RAM usage which might make it difficult, or even impossible, to manipulate a large image file.
Choose → from the image menu, or press the Ctrl-Z keys, to undo the last operation.
Choose → from the image menu, or press the Ctrl-Y keys, to redo the last undo operation.
GIMP allows you to copy (Ctrl-C), cut (Ctrl-X) and paste (Ctrl-V) within any window, as well as between any GIMP image window. You can also paste as layers.
Choose → (or press the Ctrl-L keys); → ; → from the image menu to access the layers, channels and paths dialogs respectively (see Figure 5.4, “Layers, Channels and Paths Dialogs”).
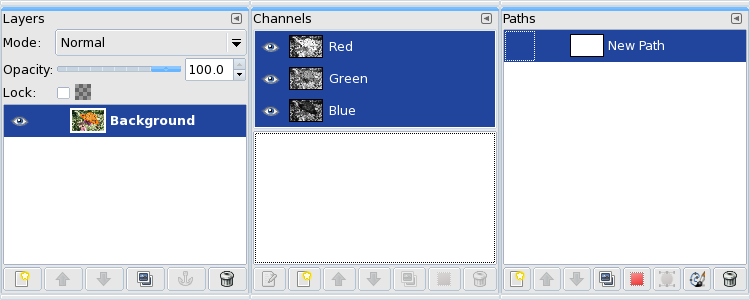
GIMP allows for an unlimited number of layers. Each layer has a specific set of properties.
In a RGB color image there are three channels, one for red, one for green and one for blue. The channels dialog lets you turn a channel off or on, as well as add and remove other channels. Clicking on the eye at the left of a channel name turns it on or off depending of its original status.
Paths let you manipulate your selections in very complex ways. You can transform selections into paths which let you treat the selection as a curve, giving you more control over it since you can, for example, add points to the curve to manipulate it.
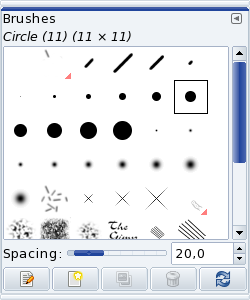
Dialogs give any tool further options. There is quite a large number of them and for the purpose of this introduction, we only discuss the Color Selection and Brushes dialogs.
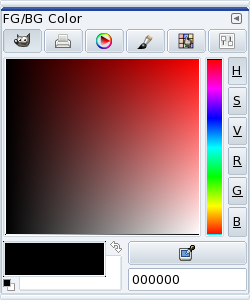
Choose the → menu to open the color selection dialog. Use the buttons at the top to select the color “space” you want to use for color selection: GIMP (which lets you select colors using different palettes: Red, Green, Blue, Hue, Saturation and Value), CMYK, color triangle, watercolor, a reduced color palette or scales. The fore/background colors are handled the same way they are in GIMP's tool box. Selected colors are active immediately after choosing them. Rule of thumb: try to work in RGB so you can have a wider number of formats to save your work into.
GIMP is ideal for web development but printing from GIMP is sometimes tricky. Because of the absence of PANTONE® Color Systems support, GIMP might not be ideal for prepress work, although CMYK images are supported.
Internally GIMP supports many printers and it is always feasible to filter images through GhostScript or print to file (PostScript). Therefore, you can print images relatively easily. Remember to adjust your resolution to match your printer's capabilities.
A lot of online documentation is available to further your knowledge about printing with GIMP, and we encourage you to explore further.
GIMP is a bitmap graphics applications, however for enterprise logos, diagrams, maps or any kind of drawing (as opposed to photo), a vector graphics application is preferred.
- Dia
Dia is a diagramming application which can be considered as an alternative to Microsoft® Visio®. It contains a set of predefined symbols for different types of diagrams you may use. Just like GIMP, Dia offers many common look-and-feel features. Right-clicking in the image gives you image-specific menus, and allows you to modify the image to your needs. Please refer to the Dia web site for more information.
- Kivio
Very much like Microsoft® Visio®. Kivio possesses a very complete stencil set and it can even use Dia stencils. Worth a try if you are familiar with Microsoft® Visio®. Please refer to the Kivio web site for more information.
- Inkscape
Inkscape could be considered the “star” of current vector drawing applications for Linux. With it you can draw anything you want (unlike Dia and Kivio). It's a very mature application available under both GNU/Linux and Windows® and it saves in the SVG format by default, easing interoperability and the support of standards. Please refer to the Inkscape web site for more information.