 Choose
→ from the main menu
to launch KMail. A configuration wizard appears.
Choose
→ from the main menu
to launch KMail. A configuration wizard appears.
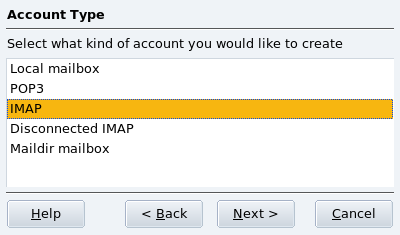
Select the account type from the suggested list and advance to the next step. Both IMAP and POP3 accounts setup are the same.
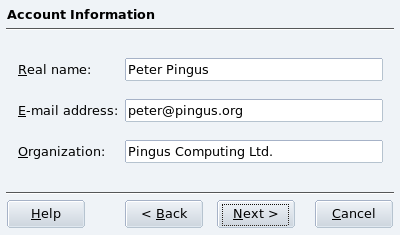
Then, you are asked about your name, email address and company name, fill these with your personal data.
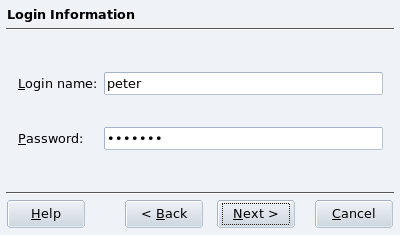
You are then asked for the account credentials: username and password. Your ISP or system administrator should have provided these along with your email address.
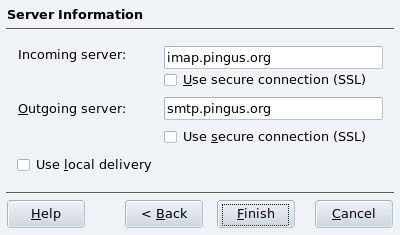
You are finally asked to provide mail server
parameters. Again, your ISP or system administrator should have
provided you with the incoming and outgoing mail servers. Outgoing
servers are usually of the smtp.provider.net
form. Incoming POP3 servers are usually of the
pop.provider.net or
pop3.provider.net forms. Incoming IMAP
servers are usually of the imap.provider.net
form. The mail.provider.net form is also
common for both incoming and outgoing mail servers.
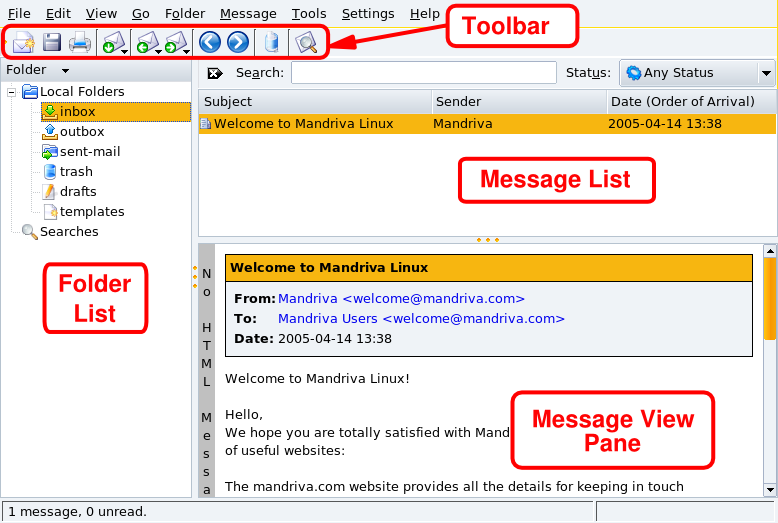
Toolbar. Where the main action buttons lie. See Table 1.1, “KMail's Toolbar Buttons”.
Message List. Where information (subject, date, sender, etc.) about messages stored in the currently selected folder is displayed.
Message View Pane. Where the currently selected message content is displayed.
Folder List. Where all folders are
listed. The default folders are inbox
(incoming messages), outbox (unsent
templates), sent-mail (already sent
messages), trash (deleted messages),
drafts (draft messages) and
templates (templates for writing
messages). There is also a special folder named
Searches which contains the results of a
search for messages.
The following table shows the most important buttons available in KMail's toolbar, their equivalent keyboard shortcuts and a brief explanation of the functions they provide.
Table 1.1. KMail's Toolbar Buttons


![[Note]](images/note.png)