![]() Choose
→ from the main menu to launch
Kopete. A configuration wizard appears.
Choose
→ from the main menu to launch
Kopete. A configuration wizard appears.
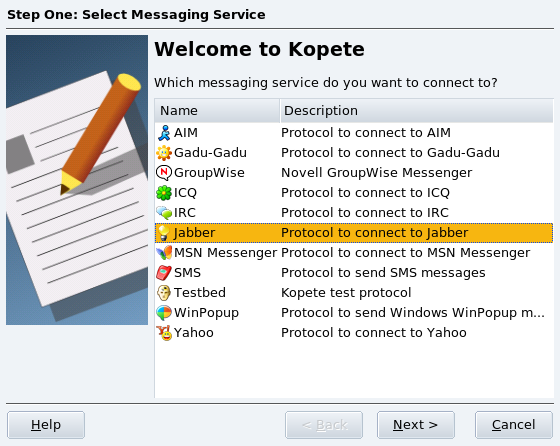
Kopete supports communications with many popular messaging applications such as MSN, Yahoo, ICQ, IRC, etc. Select the messaging service from the list and advance to the next step. Please bear in mind that the different messaging protocols have different configuration parameters. We show you how to setup an instant messaging service account and then an IRC service account.
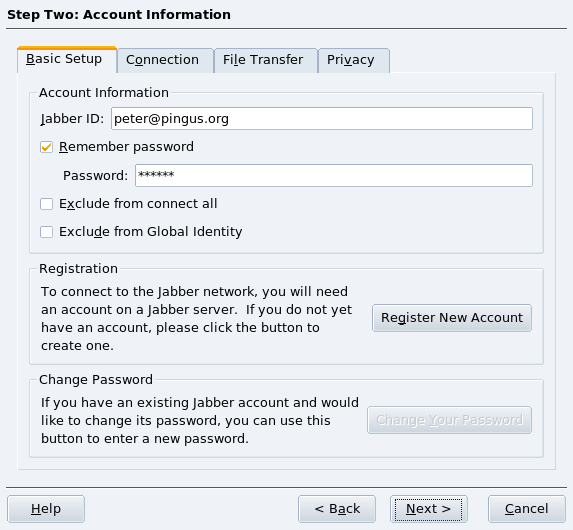
Now you have to provide the account parameters: as a minimum a username (or email address) and a password; some messaging services may need other options too. Refer to the messaging service documentation for more information on the account parameters to be set.
![[Tip]](images/tip.png) |
Tip |
|---|---|
Most messaging services have a button that you can click to get a new account with that service. |
Finally you are invited to connect to the messaging service and finish the messaging service configuration wizard. Uncheck the Connect now option if you wish to connect later.
Choose
→ from the menu,
then select the Accounts section and click
on the button to add an account for a
different messaging service. We now add an account for IRC
server irc.freenode.net, channel
#mandriva, where you can get support for your
MandrivaOne system from other users of Mandriva Linux.
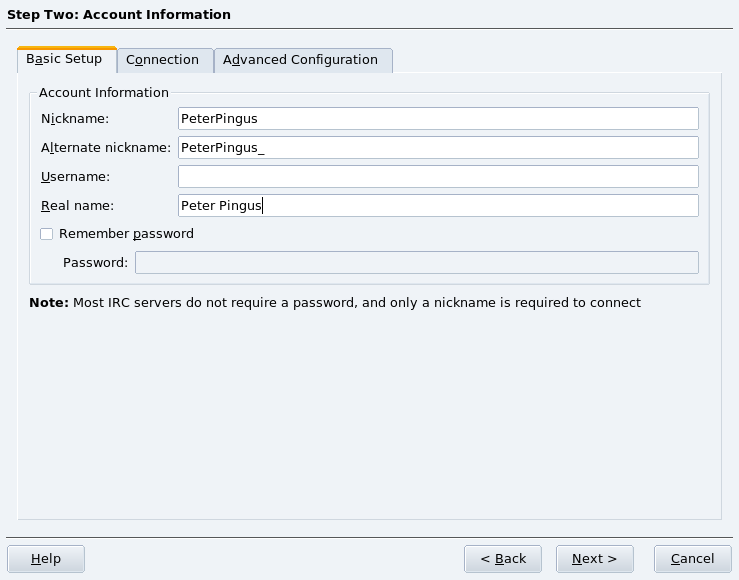
Provide your nickname[1] and an alternate one (in case someone else already has registered the nickname you've chosen), and optionally a username and a password.
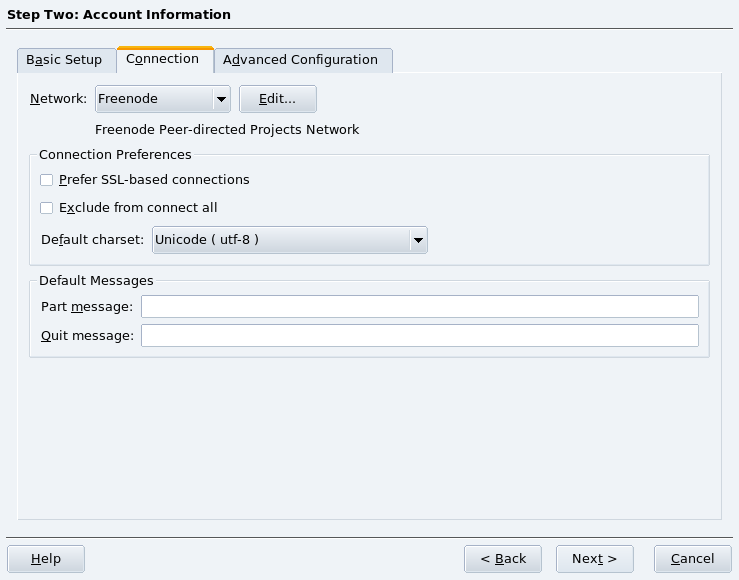
Then, select the Connection tab and choose an IRC network using the Network pulldown list. You can also select the default encoding and other options. Advance to the final step and finish the wizard.
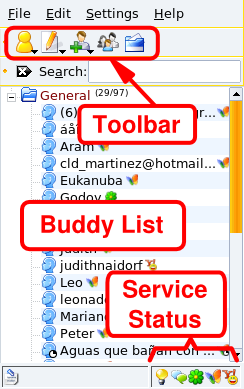
Toolbar. Where the main action buttons lie. See Table 1.3, “Kopete's Toolbar Buttons”.
Buddy List. Where an entry is displayed for each of your buddies who is online, together with an icon identifying the protocol they are using. Buddy status is indicated as follows:
 the buddy is currently
online, but not available. Depending on the messaging
service you might be able to send him messages anyway, which
your buddy sees when he's available again;
the buddy is currently
online, but not available. Depending on the messaging
service you might be able to send him messages anyway, which
your buddy sees when he's available again; the buddy isn't currently
online, you cannot send him messages. Please note that you
might not see this status at all if you decide to hide
offline buddies.
the buddy isn't currently
online, you cannot send him messages. Please note that you
might not see this status at all if you decide to hide
offline buddies.
 The buddy is currently
online and available;
The buddy is currently
online and available;Service Status. One icon is displayed for each messaging service configured. If the icon is colored, it means you are currently online on that service, otherwise the icon is grayed. Right click on the service's icon to access a menu with actions for that particular messaging service.
Table 1.3. Kopete's Toolbar Buttons


To start chatting with a buddy, simply double click on his nick on the Buddy List. The window is divided in two, you type on the lower frame, and see the conversation on the upper frame.
IRC is a bit different, you first have to join a channel on a server. Think of channels as chat rooms where you can speak about a given topic. To join a channel:
Type the name of the channel in the dialog box that appears. Channel names start with a sharp symbol (
#), for example#mandriva.A window similar to the IM one appears, it also has a list on the right with the people connected on that channel. If you don't see a list of people, it means you are alone on that channel, please try a different channel or wait for someone to join the channel.
Repeat the above procedure to connect to other IRC channels on the same server, a window opens for each channel you connect to so you can chat simultaneously on all channels you join.
There are many resources on the Internet about the so-called “netiquette”, which are norms and rules (some can be described as common sense) one should observe for fair behavior when chatting with other people. You can perform a search for “chat netiquette” (using Google) for more information.