 |
PCLinuxOS — Getting Started |

Welcome
This short guide is not extensive. It is meant to help our new users get off to a good start with PCLinuxOS by performing a few preliminary tasks, such as refreshing the package manager (Synaptic) before first use and setting up the graphics environment and internet connection.
You will be introduced to our main system configuration tools (PCLinuxOS Control Center) and given a few examples how to use them. Our repository offers a huge variety of tested packages. Feel free to start customizing your system however you can imagine. With PCLinuxOS, it is radically simple.
The default passwords are guest and root.
PCLinuxOS Control Center

Access the PCLinuxOS Control Center (PCC) through the main menu (System → Preferences → Configure Your Computer). As with all system configuration tools under Linux, you must provide the system administrator's password.
The left panel contains a list of configuration choices by category. We'll use Hardware and Network & Internet. The right panel contains individual tools for specific tasks.
PCC → Hardware → Configure Video Card

Select the item you want to change.Click Quit when finished. You will have to restart the X server by logging out or rebooting.
Graphics Card
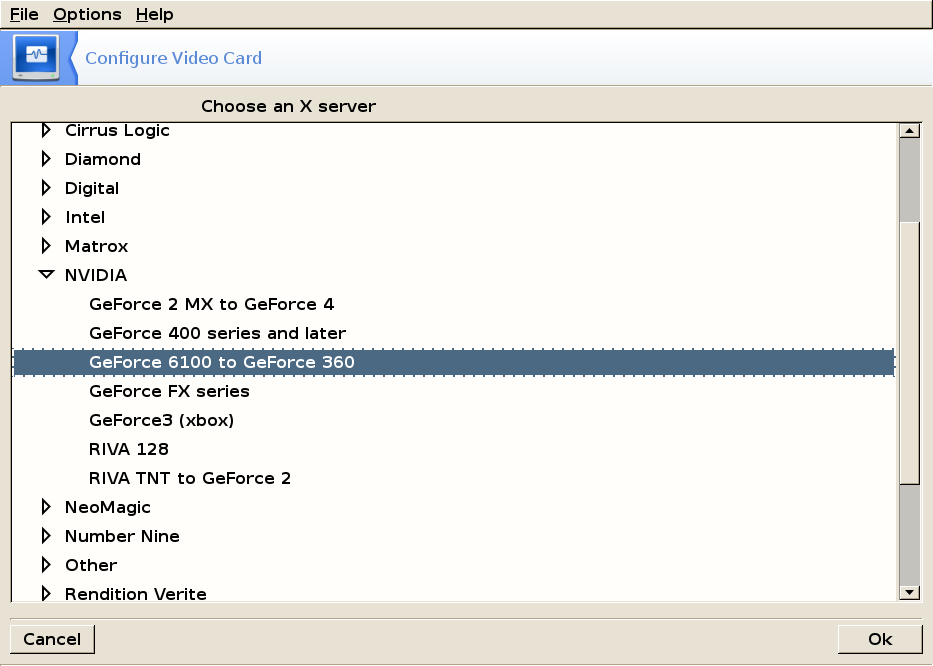
Choose a video card from the list.
If you don't find your card, refer to Driver Installation
Monitor

Choose your monitor from the list. If you cannot find it in that list choose a generic monitor that has the same specifications or use the Custom monitor choice and enter manually the vertical and refresh rates specified by your manufacturer.
Resolution
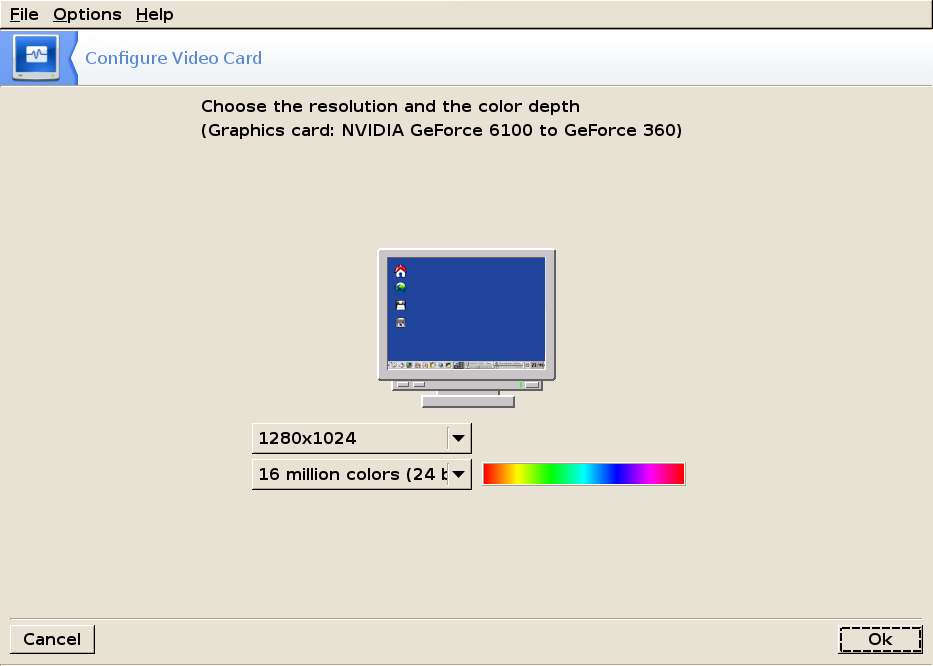
Choose your resolution and color depth from the drop-down lists.
| Voila ! | [Top] |
PCC → Network & Internet → Setup a new network interface (LAN, ISDN, ADSL...)
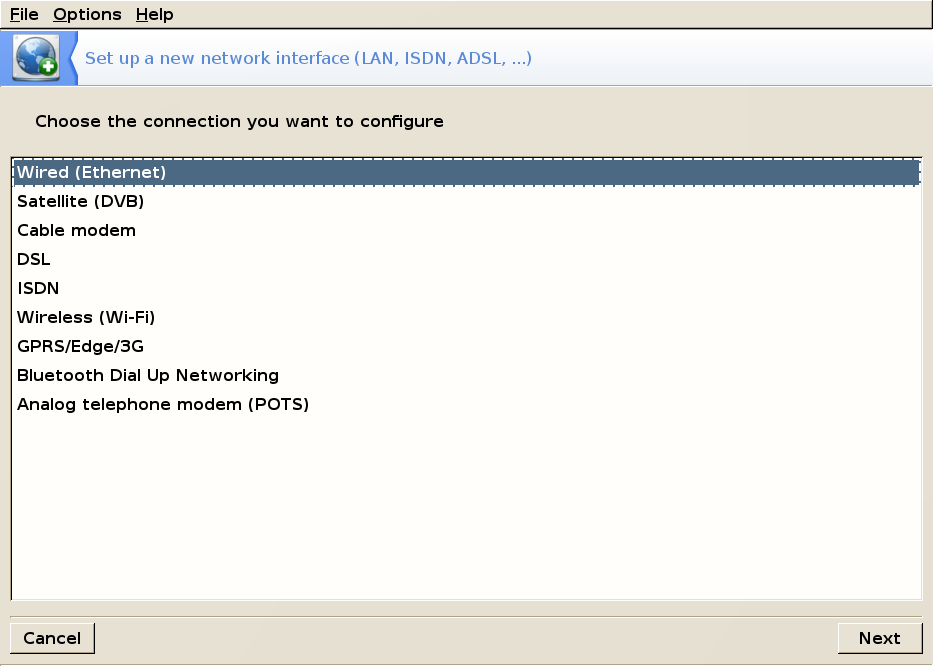
Select your connection type from the list:
Ethernet Setup
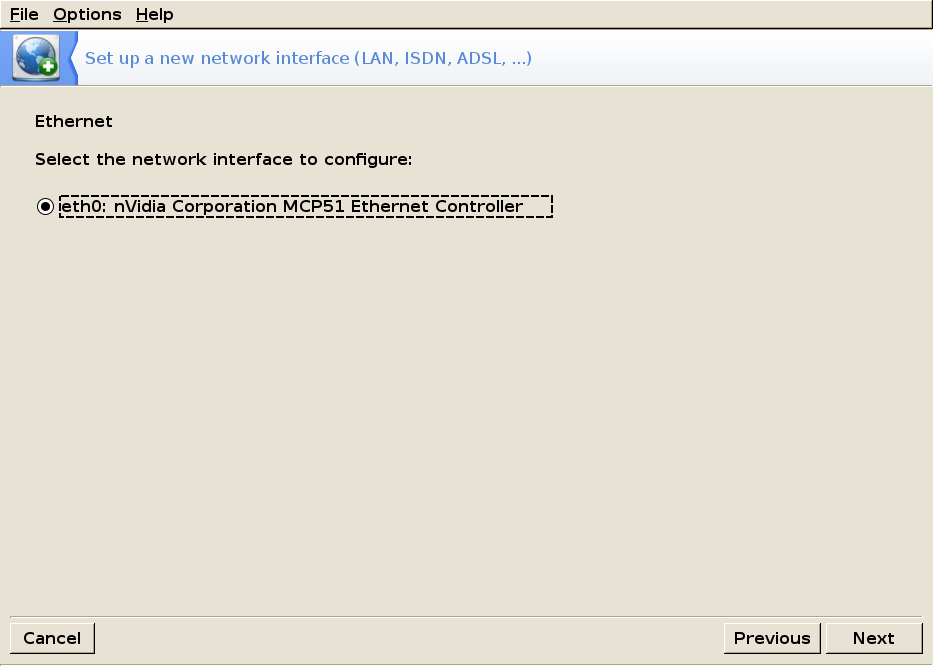
Check your internet interface type.
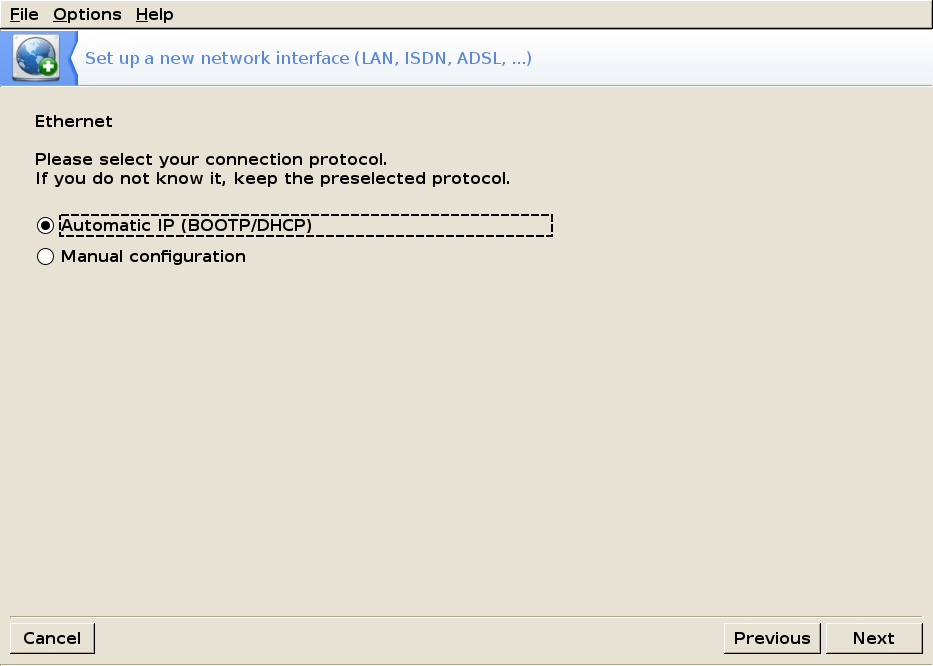
Select the IP setup you will use.
Ethernet — Automatic IP (DHCP)
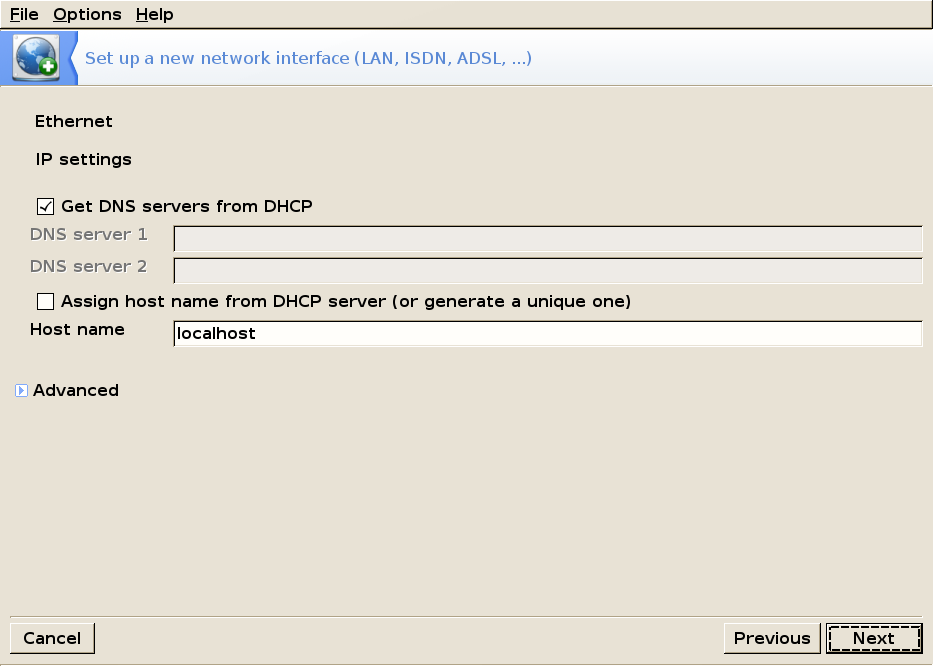
If you're using an automatic IP, enter the name servers (if you don't know what that means you most probably should leave that like it is).
Clicking Next will take you to the Connection Control screen.
Ethernet — Manual Configuration
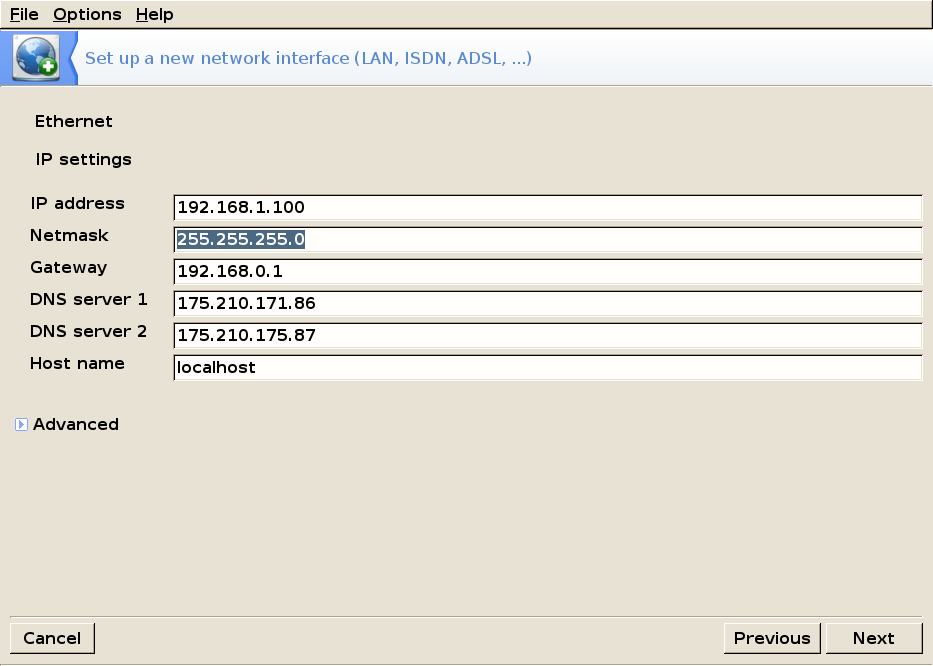
If you're using a manual configuration, then you have to manually enter the required information.
Clicking Next will take you to the Connection Control screen.
DSL Setup

Select your provider from the list or configure manually (if not available in the list)
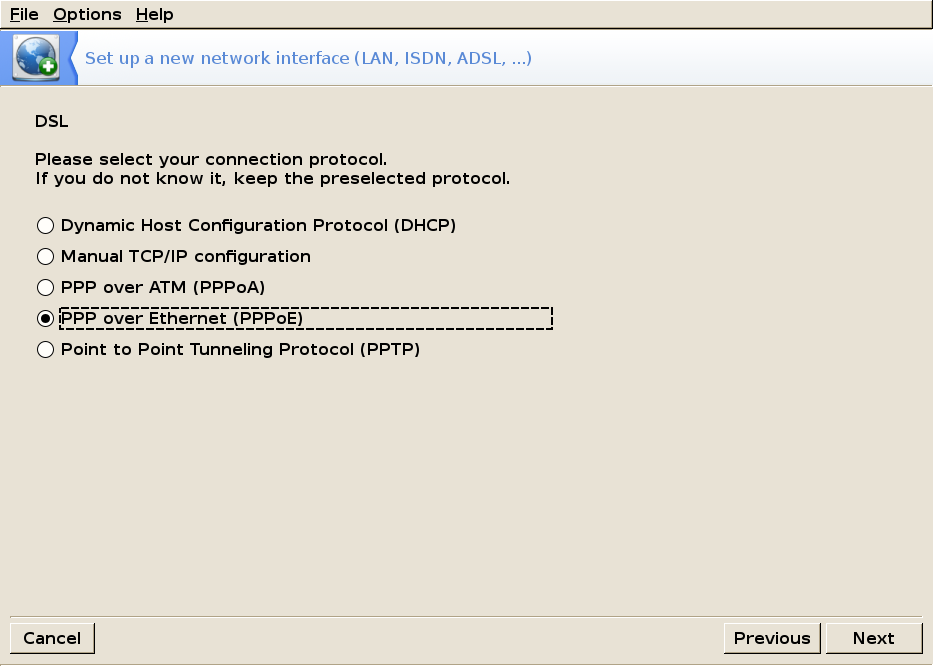
Next select your connection protocol:
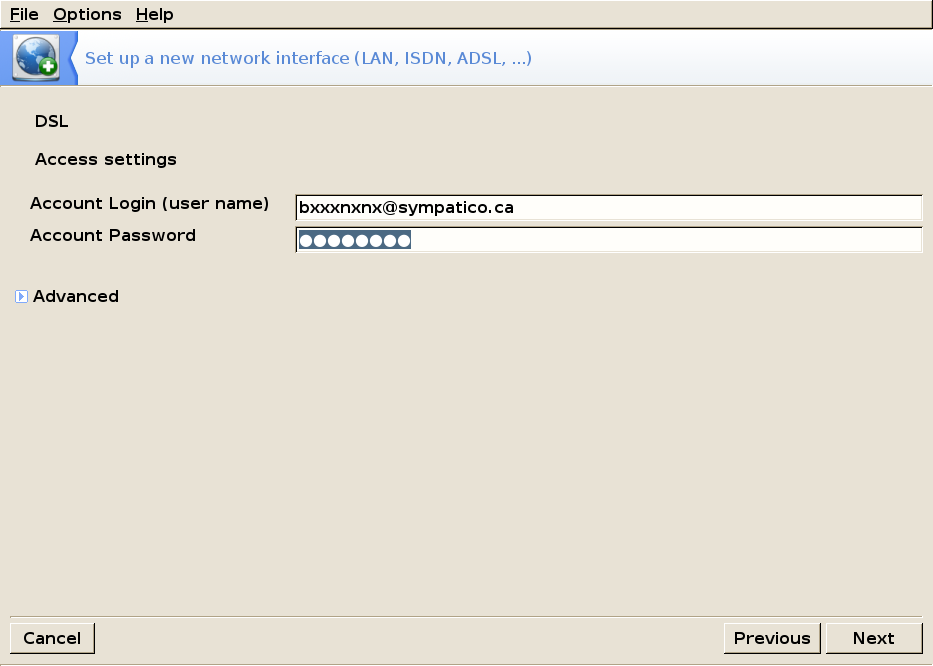
Then enter the user name and password provided by your ISP:
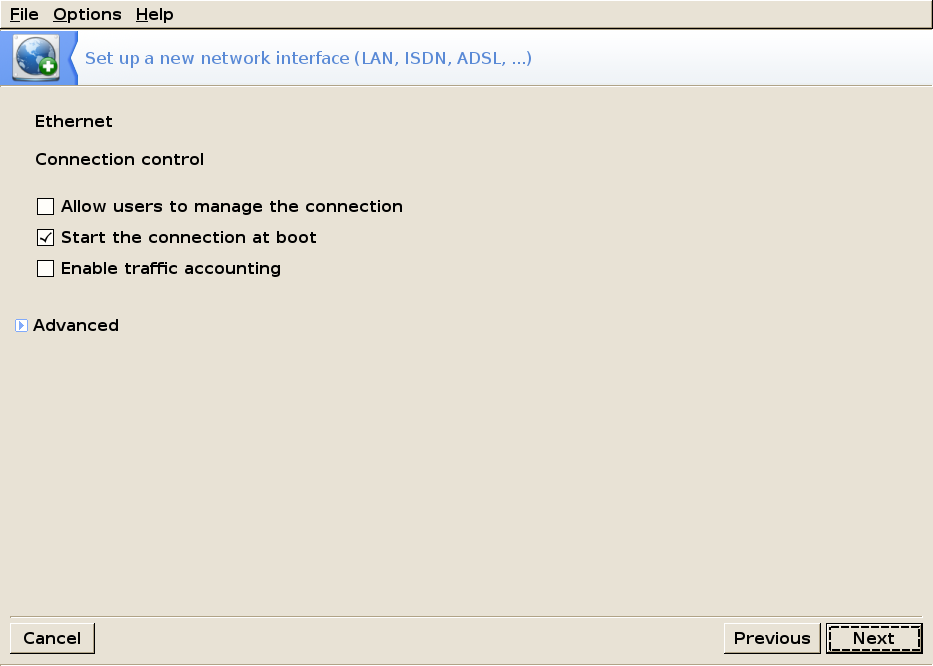
Here you can choose whether you want your connection to start at boot or not and if regular users are allowed to manage the connection (the default settings are recommended)

Then you will be able to start the connection:
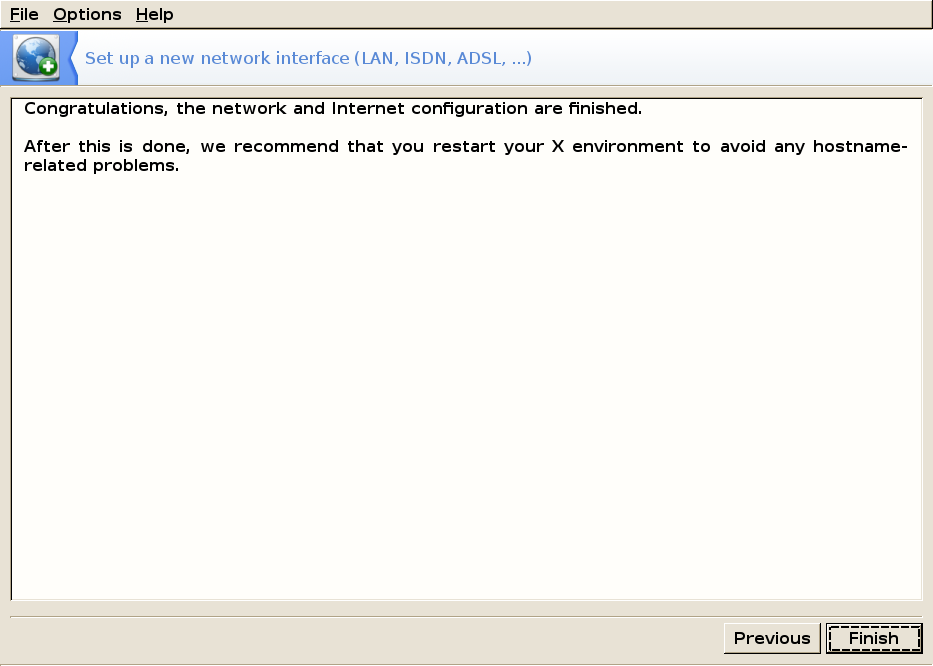
You should log out and log back in to avoid any host-name related problems:
WiFi Setup
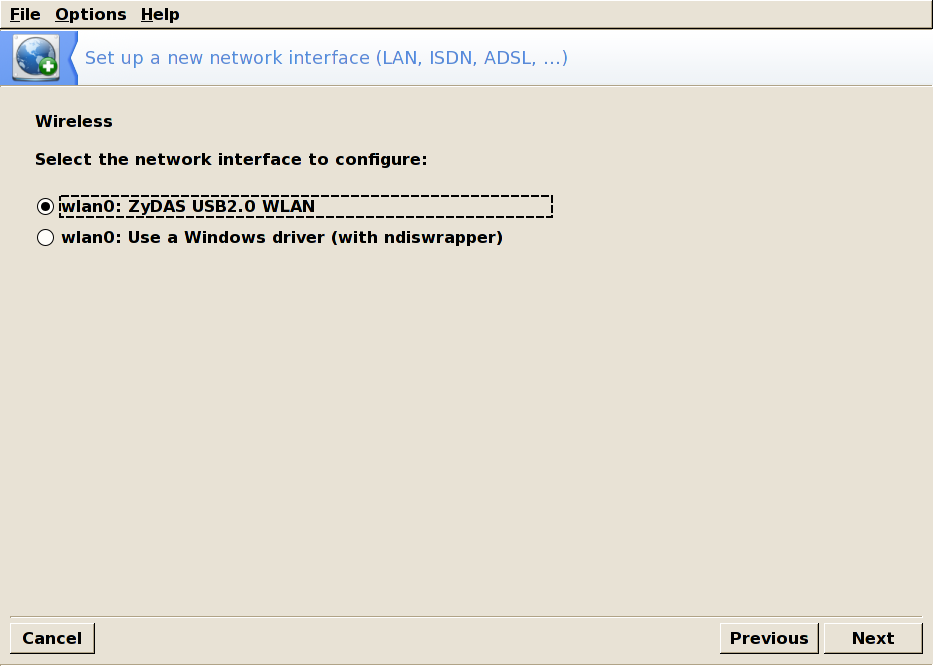
Detected network interfaces are shown. Check one.
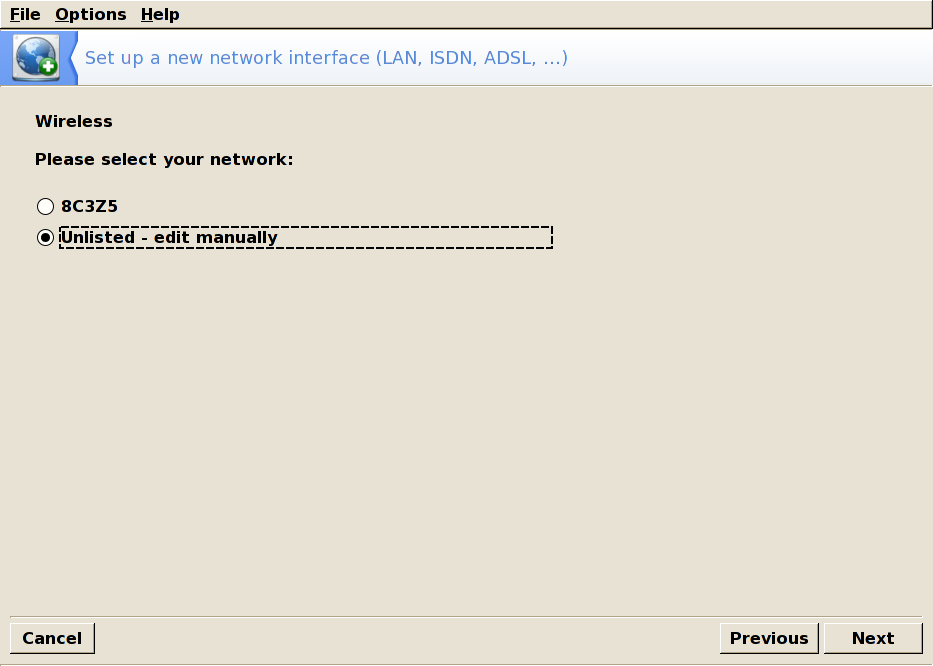
A list of detected networks is then shown. Select yours; otherwise, choose unlisted.
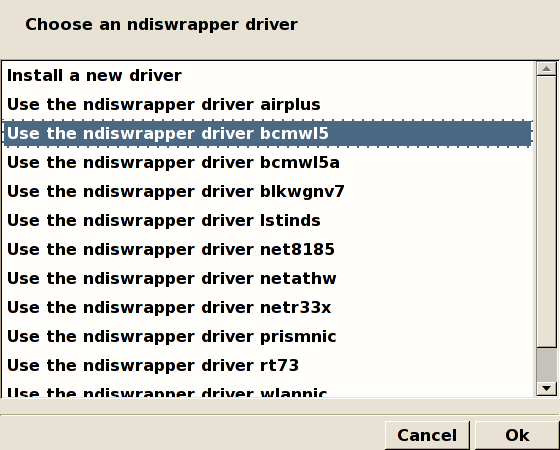
Search and select an appropriate ndis driver or select install a new driver from the list. If your WiFi card is not listed, insert the manufacturer's card drivers CD, then choose the Use a Windows driver (with ndiswrapper) entry and select the driver (it's a file whose name ends in .inf) from the CD.

If you are unable to select a driver you will have to do some research.
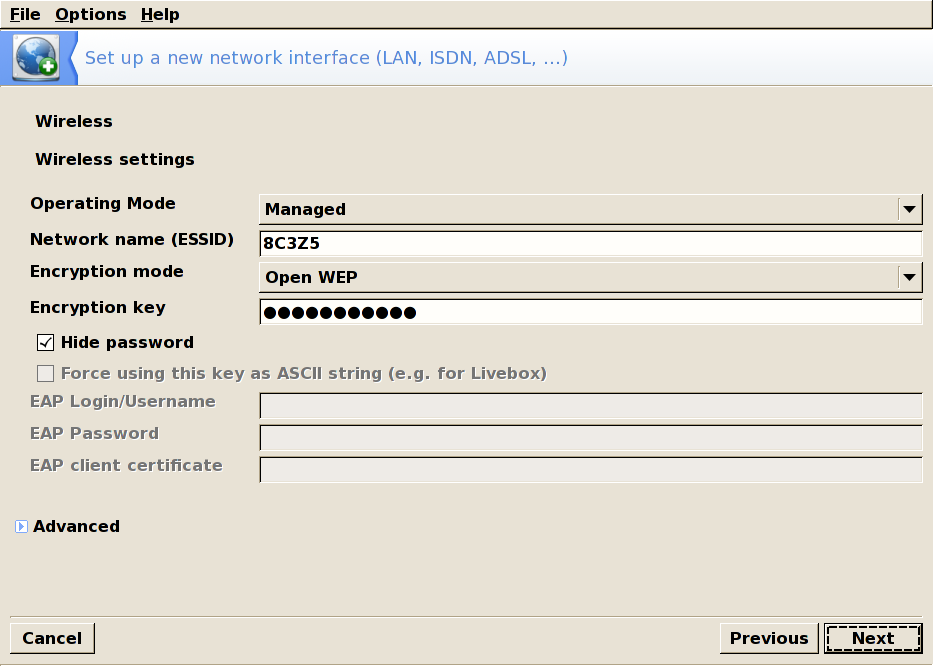
The mode the card will operate on, with respect to the other WiFi devices in the network. The most common one is Managed to simply connect to an existing access point.
Network Name (ESSID)The name of the network you want to connect to.
Encryption ModeThis depends on the network settings
Encryption KeyThis also depends on the network settings
Remaining configuration is similar to the traditional Ethernet network setup
![[Note]](Images/notes.png) |
Note |
|---|---|
|
Check the Allow Access Point Roaming box if you want the connection to automatically switch from one access point to another, depending on its signal strength. This is particularly useful when moving a laptop around. |
Synaptic Package Manager
It is recommended that before installing any package you set up your repositories. The repositories are places in which all software packages available for PCLinuxOS are kept and maintained. These repositories are available at several locations on the Internet. They are all identical and they are called mirrors. The mirrors are updated on a regular basis, keeping themselves in sync with ibiblio (the PCLinuxOS main repository).
From the Synaptic menubar, select Settings → Repositories.
|
Note |
|---|---|
|
Enable ONLY ONE mirror at a time. If you have problems connecting to or downloading from a mirror, un-check (un-tick) it and enable another one. After any change, Synaptic must reload the package information from your chosen mirror. |
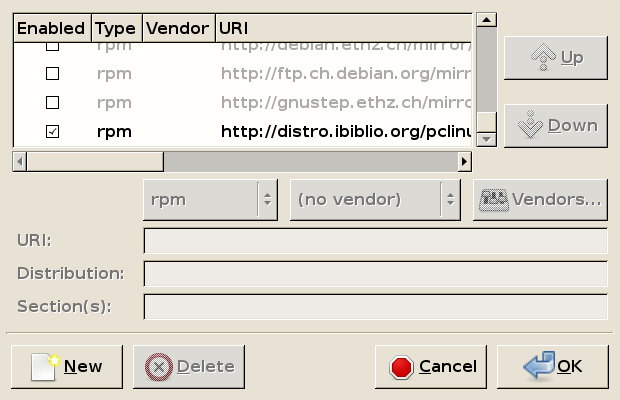
As you can see, the default mirror is ibiblio.org. In order to increase your speed while downloading software packages from a mirror, you are advised to choose a location near you to take advantage of the bandwidth such a connection could provide.
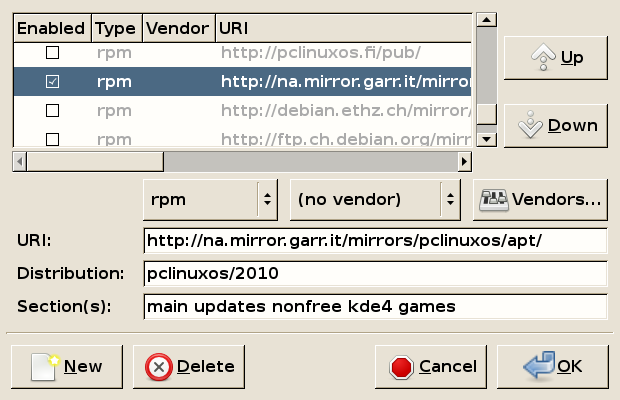
Example: suppose you live in Italy. Un-check the ibiblio.org location, scroll down until you find the local mirror rm.mirror.garr.it and select it (check box).
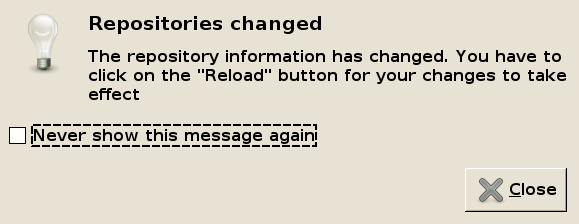
You will be notified that you have to reload the package information (so the changes take effect). Close this reminder and click on Reload (at the top-left of the Synaptic window). Synaptic will now reload the package information from the mirror:

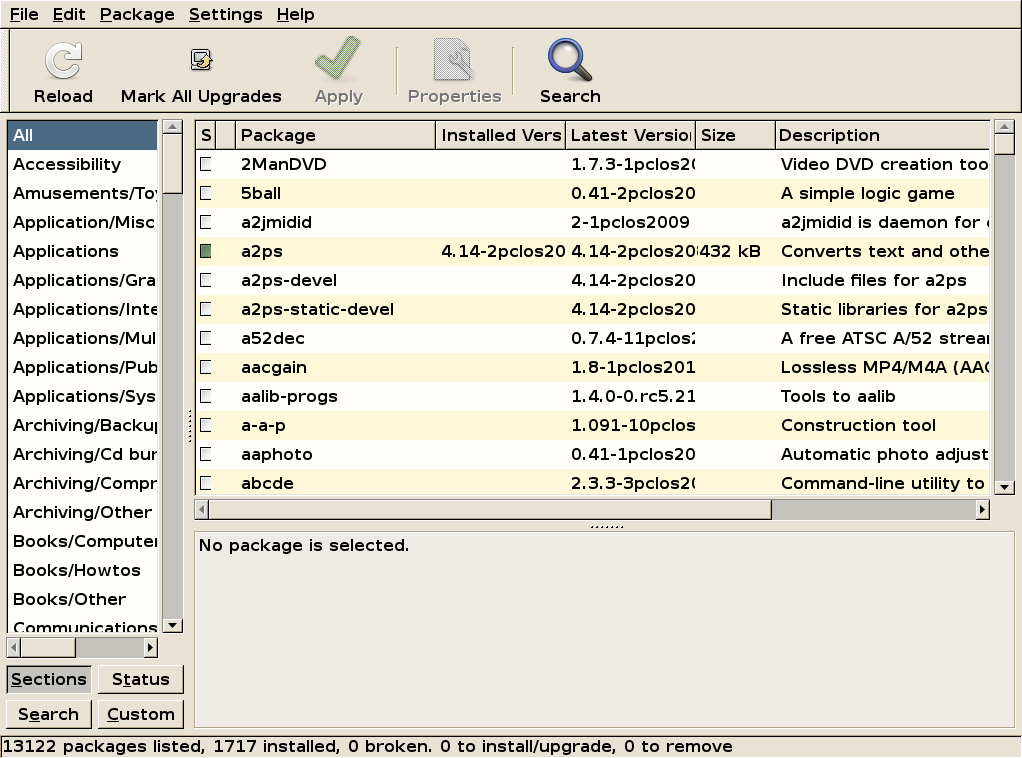
You have now finished setting up your repositories. Next, it is recommended you upgrade your system. On the upper menubar, click Mark All Upgrades then click Apply . You will now have an up-to-date system.
Graphics Card
| Driver Installation | Configuration |
This section will demonstrate software installation. Normally, most hardware is detected and drivers are enabled automatically.
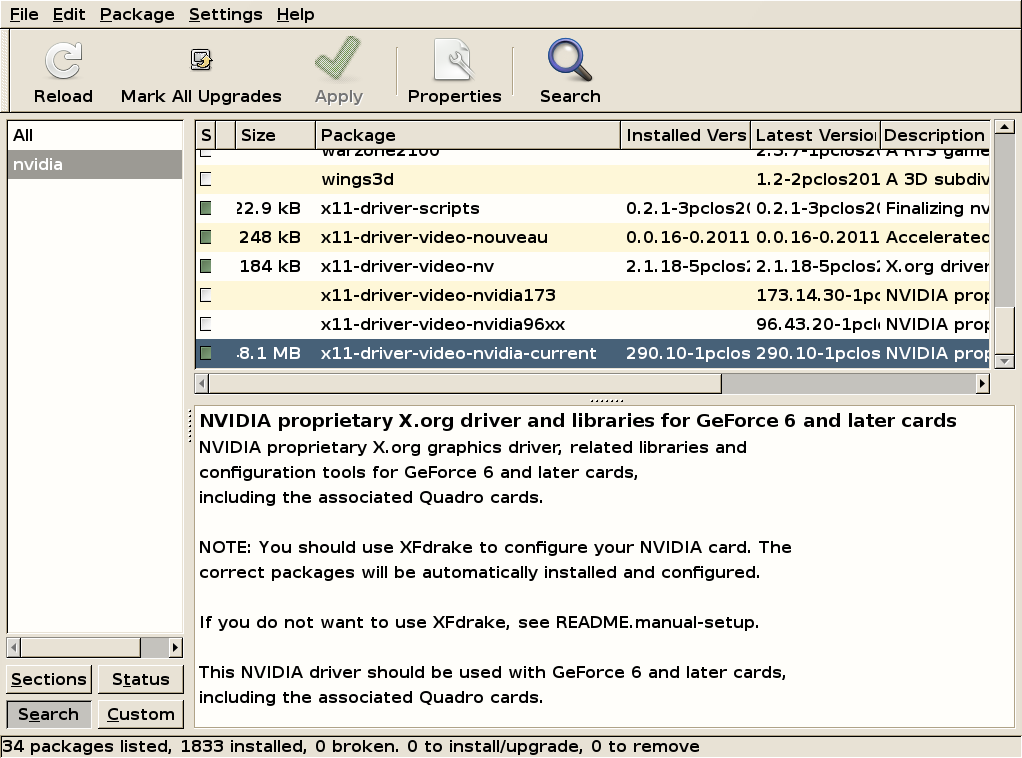
The author of this guide uses a nVidia card so we will go with that one for an example. For those who use AMD (ATI) cards the procedure is similar.
Find the driver for your card. This can be done either by using the Search button or (Synaptic also has real-time search) just selecting any entry in Synaptic package list and then typing nVidia. The relevant entries will appear. There are several driver versions depending on the model and generation of your card. For each driver there's a corresponding description in the lower part of the screen. Select the driver for your card then click the check box and select Mark for installation then Apply
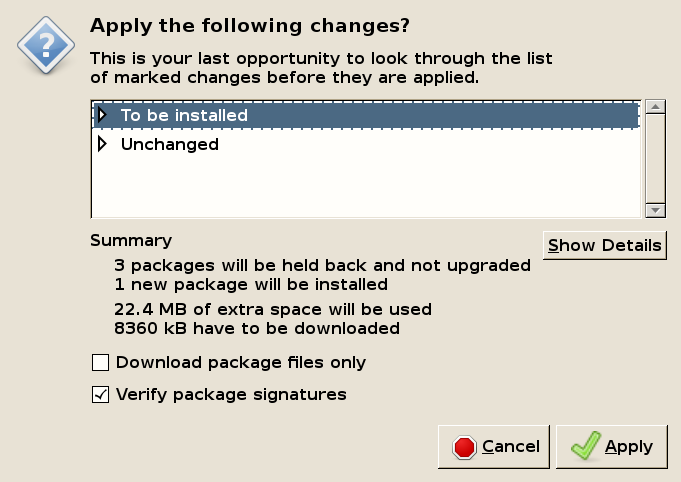
Synaptic will ask for confirmation. Click Apply to download and install the driver.
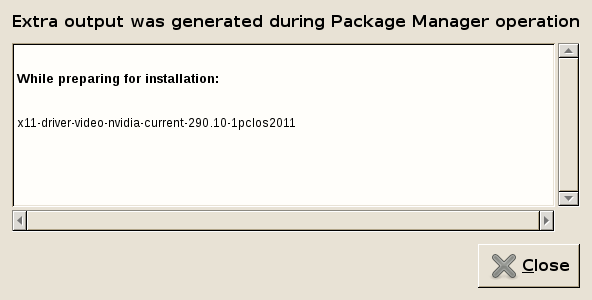
The next popup will show the status of the install. Close and allow Synaptic time to reload (it does that after each working session in order to update the list of installed packages).
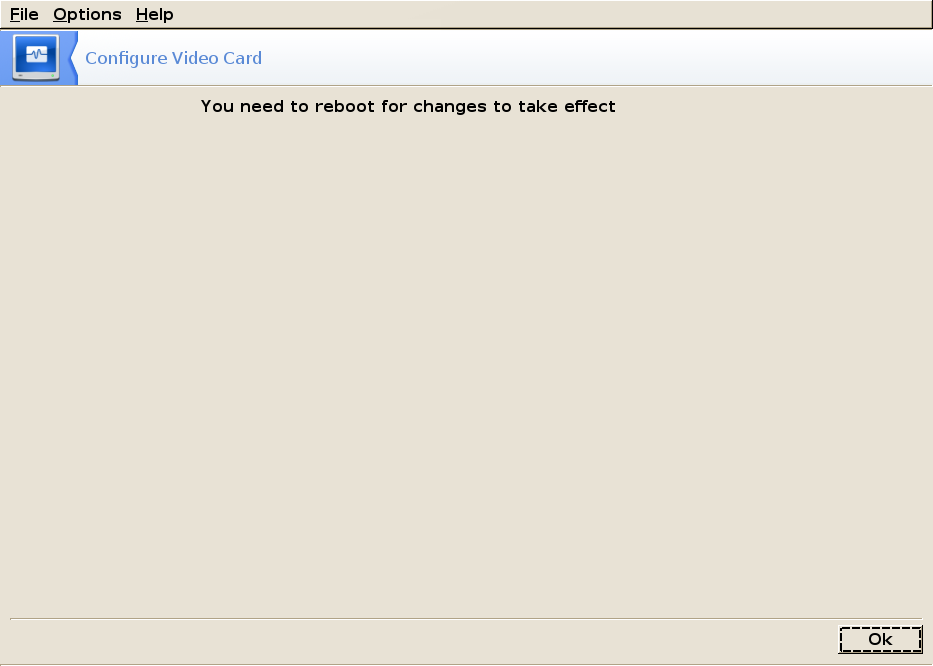
Then close Synaptic and reboot. You must reboot to complete the installation of drivers, Most normal software does not require this.
| PCLinuxOS forum | Gnome forum | PCLinuxOS Help | PCLinuxOS Magazine |
 This work is licensed under a Creative Commons Attribution-NonCommercial 3.0 Unported License
Last edited Feb 20, 2012 by ongoto