Before installing MandrivaOne to the system's hard disk and if there is already another operating system present on the hard disk (like Windows® for example), it is strongly recommended you perform a disk defragmentation in order to optimize the available space on the hard disk.
![[Warning]](images/warning.png)
![]() Click on this icon on the desktop to
start the install wizard. The following steps are performed:
Click on this icon on the desktop to
start the install wizard. The following steps are performed:
-
Where to Install Mandriva on your Hard Disk
Depending on what you currently have on your hard disk, you can now choose where your new Mandriva system will reside. Bear in mind that reusing existing partitions of an former operating system or deleting them will result in data loss. If you select the Custom disk partitioning option, you can control your partitions using DiskDrake (see Managing Your Partitions in Starter Guide).
-
File Copy
Then, files are copied to the hard disk, no intervention is required on your part. This takes a few minutes, depending on your system's speed.
-
Bootloader setup
This step installs the menu that allows you to choose which operating system to boot at machine startup. You can safely accept the default settings. Click on if you need to have access to more configuration options.
-
Finish
Just click on the button and then restart the computer (++), removing the CD/DVD when prompted to.
A few settings have to be configured after the system boots from the hard disk.
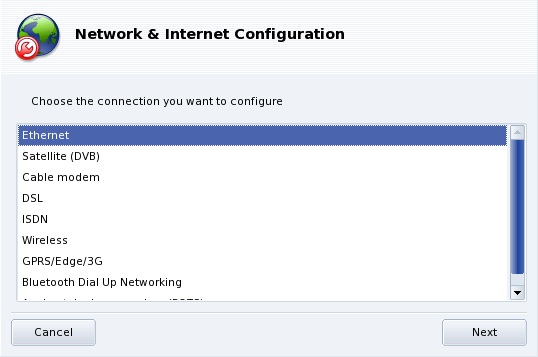
This is basically divided in two parts: selecting the network type; and configuring the required network parameters, which depend on the network type selected. Make sure you have all the required network settings (depending on the network type: IP address, DNS servers, gateway IP address, etc.): your ISP or system/network administrator should have provided them.
![[Note]](images/note.png) |
Note |
|---|---|
|
Dial-up Connection. Select the Analog telephone modem (POTS) network type. Cable-modem. Some cable-modem connections require you to select the Ethernet network type. Check with your ISP or system/network administrator. Cellular Networks. To connect to a wireless cellular network type, choose the GPRS/Edge/3G entry. |
-
Connection Type
Your network device is automatically detected according to the network type you selected. If this is not the case, you have the option to manually select the network device.
-
Network Parameters
Fill all required parameters for the connection type you chose.
-
Connection Status
After setting up all of the parameters, you are asked if you want to start the connection at boot; unless you have a dial-up connection type (or some other “not-always-on” type), leave the box for this option checked.
Finally, you are asked to connect to the network to test everything works as expected. If something fails, go back, check and change the settings as required. You are now connected to the network, click on the button.
The
root user is the system's administrator, and basically
can do whatever he wants with the system, so it's extremely
important to select a good, hard to guess, password to protect
the root account. This password will be asked of you
whenever you wish to do administrative tasks (such as installing
new software) on the system.
![[Tip]](images/tip.png)
The password is not
displayed on screen as you type it. You are asked to enter the
password twice, for confirmation. Please note that if you type it
incorrectly, you have to use this “incorrect”
password at least on the 1st login as
root, so please type carefully.
You must create an unprivileged (also called “regular”, or “normal”) user for everyday usage of the system.
-
Fill in the fields with the required information and then click on to create the account. Please note that even if this user's password is not as crucial as
root's there's no reason to neglect it or leave it blank, after all it is your files which are at stake.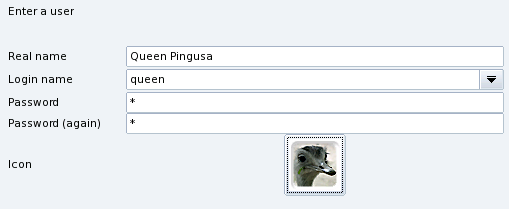
If other people are going to use the system continue creating users for each of them, then click on when you have finished adding users.
Whether you already have Mandriva accounts or wish to register your new product to benefit from all the associated advantages, this wizard will guide you. Make sure you read explanations carefully before advancing, or click on to skip it altogether.
Once this is done, the system is ready to be used, just go ahead and provide your credentials (username and password) to start using the system.