Mastering Shadows
by
Introduction
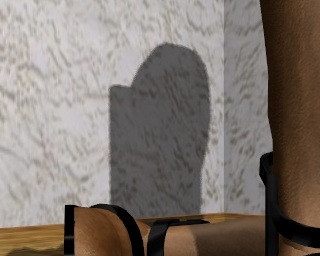
Beginners are often puzzled during their very
first renderings. They usually think that they only have to create a model
and to give it a material for the picture to be rendered, forgoting that
a light source, like a lamp, is necessary in order to get anything else
than a black screen. Once this very first detail is mastered, they surely
wonder why there isn't any shadows in their scene.
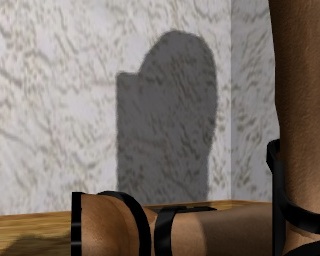
This tutorial is all about generating shadows
(which is pretty easy) and making them looking the way they should look
like (which can become very intricate).
|
|
|
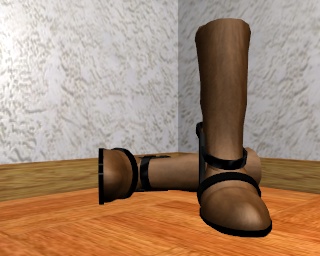
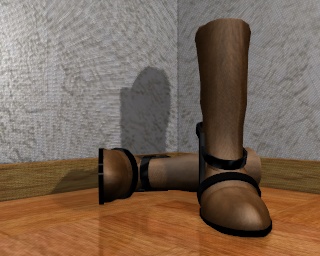
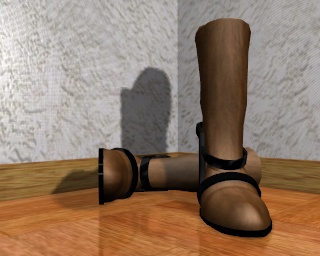
A cool beginner picture...
|
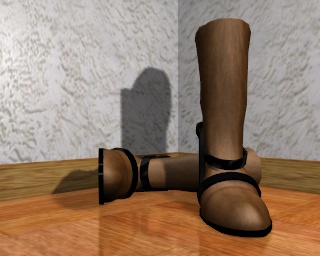
...transfigured by the use of EnvMap
on the floor and, of course, the use of shadows !
|
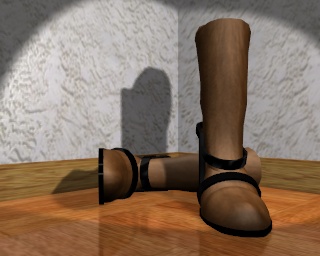
Note about this scene : the topic of the
scene is somehow inspired from the outstanding photorealistic researches
led by Manu Batôt on his own webpage.
The boots model comes from Michael's
Blender Website.
Casting shadows
There are a few pre-requisites for Blender
before being able to cast shadows. They won't be reminded anymore during
this tutorial.
In the Material Buttons (F5-KEY):
-
Materials who should have a shadow must be
set with the "Shadow" button 'on' (default in Blender). By enabling this
button, Blender calculates a shadow for this object.
-
Materials which should receive the shadow
of another object should have the "Shadowless" button set 'off' (default
in Blender). By enabling this button, Blender won't cast shadow over this
object.
As these are defaults Blender values,
you shouldn't ever bother about them, at first.
In the Lamp Buttons (F4-KEY) :
-
The only lamp type than can be used for casting
shadows is the Spot.
-
The Spot lamp should have the "Shadows" button
set to 'on' (default in Blender). The Spot then cast lights AND shadows.
-
The Spot lamp could be set to "Only Shadow"
if there's another lamp in your scene. The Spot then ONLY cast shadows,
but no light.
The default Blender lamp is the Lamp,
which doesn't cast shadow, so you HAVE to set at least a light source as
a Spot if you want to cast shadows. Please note that among all the lamp
types available within Blender, Spot is the ONLY one that can cast shadows
at all.
In the Render Buttons (F10-KEY) :
-
The "Shadows" button should be set to 'on'.
The default value for this button in
Blender is 'off', so don't forget about it if you want to cast shadows
at all !
Basic knowledge
In order to calculate shadows, Blender uses
the shadow buffer algorithm. This means that the scene is rendered
from the point of view of the Spot, and that Blender calculates which object
is placed before the other on its linesight, thus defining which pixels,
'hidden' from the spot/camera sight by anyone object, will receive shadow
in the final render.
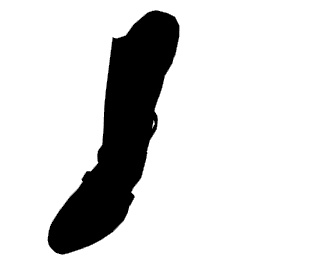
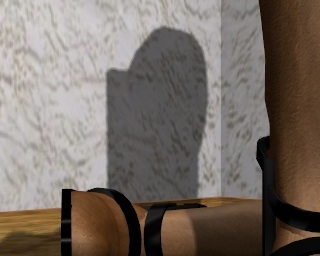
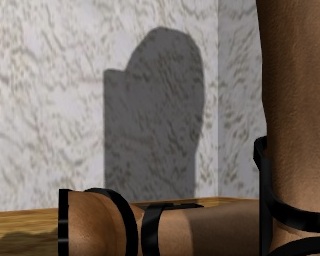
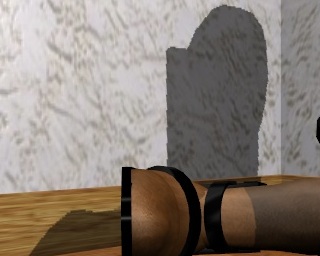
The way it operates could be explained
like this, even if it is far from being accurate and involves different
mechanics (like storing a pixel distance from the Spot, for example) :
in our example picture, here's a render from the Spot point of view of
what the shadow cast by the foreground boot could look like. Given that
the light (white) values are discarded, this picture could be 'mapped'
on the objects located behind the boot, with the Spot origin as coordinates
for the texture's own origin, with the shadow color adding to the base
color of the object.
Of course, if there are many Spots in the
scene, Blender 'renders' the scene as many times, from each Spot point
of view, and stores the results in its shadow buffer in order to bestow
light or shadow values accordingly to each pixel of the final render. This
is why multiple Spots add to the rendering time.
With this in mind, it is now easier to
understand the use of some instrumental buttons and sliders from the Lamp
Buttons (F4-KEY). In fact, the parameters we will deal with thereafter
are set individually for all the Spots of a given scene.
Size of the shadow buffer
(BufSi)
As we have seen before, information about
pixels that get light or shadow is stored in a buffer, which acts exactly
the same as a rendered picture. This means that the shadow buffer has its
own resolution, than can be set accordingly to the effects your are after.
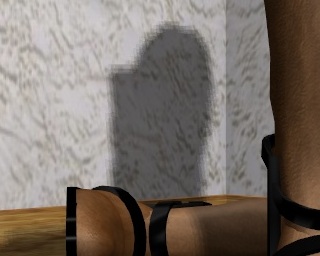
By default, Blender's buffer size value is 512x512 pixels.

|
|
|
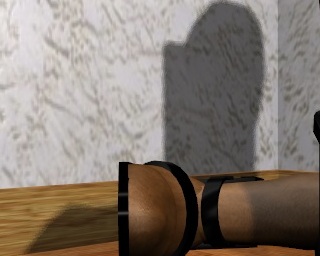
BufSI set to 512
|
Zoom: The shadow is blocky
|
This kind of effect is good enough when
the camera from which the final picture is rendered isn't too close to
the shadows, because at a distance, it is very hard to tell about the blocky
look of the shadow.

|
|
|
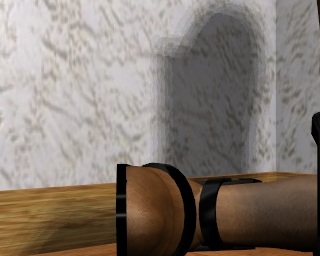
BufSi set to 2048
|
Zoom: The shadow is far more progressive
|
When you increase the Buffer Size, of course,
the shadow gets more accurate borders, better for close shots of an object
and its shadow. BufSi behaves exactly as the resolution of a rendered picture
does.
Size of the Spot (SpotSi)
The angle of beam of your spot also has a
great effect on the blocky look of your shadows. I rendered the previous
pictures with a SpotSi set to 120.00 degrees.
|
|
|
|
BufSi set to 512, but SpotSi set to
120.00 degrees
|
Zoom: As seen previously, the shadow
is blocky
|
Now let see how well does the rendering
with a smaller beam, set to 60.00 degrees.

|
|
|
BufSi set to 512, but SpotSi set to
60.00 degrees
|
Zoom: The shadow is more progressive,
but less than with a higher BufSi
|
It is clear enough that the smallest the
angle of beam is, the sharper the borders of the shadows are. There's an
immediate conclusion to this : before setting the BufSi to any great value,
first enhance the quality of your shadows by seting the SpotSi value as
small as possible ! You will spare both memory and rendering time ! We
could say that SpotSi behaves as the Lens of a camera does.
Samples
In the previous renderings (BufSi set to 512,
SpotSi set to 60.00 degrees) we can see that the shadows are smooth, but
perhaps not enough. Before trying to increase the BufSi, we will try to
set the number of samples to a higher value.
|
|
|
|
BufSi set to 512, SpotSi set to 60.00
degrees and Samples set to 3
|
Zoom: The shadow is quite acceptable
|
|
|
|
BufSi set to 512, but SpotSi set to
60.00 degrees and Samples set to 5
|
Zoom: The borders have been anti-aliased
|
It is very hard to tell the difference
between Samples 3 and Samples 5 at first, but looking at the zoom closely,
it becomes obvious that the borders of the shadows have been smoothed.
In fact, Samples behaves the way OSA does.
Intermediate conclusion
You have now achieved a better understanding
of how shadows should be cast in order for them to be the highest quality
as possible. You have understood that BufSi is the key to quality, but
also the cruder mean to achieve it, because it asks for a lot of memory.
As a thumb of rule, let say the following :
-
Try to set all your SpotSi within 45.00 and
60.00 degrees values.
-
Set Samples to 5.
-
Try to set BufSi to 768 or 1024.
With this in mind, about 70% of your renders
will have the best quality/render-time ratio. If you have enough RAM memory
and if time isn't a factor for you (eg, you are dealing with a still picture,
not an animation), then you can set the BufSi to the highest value you
choose. A high BufSi combined to low SpotSi values and high Samples gives,
of course, the very best results Blender can let you achieve.

|
|
|
BufSi set to 2560, SpotSi set to 60.00
degrees and Samples set to 5
|
Zoom: It is up to you to choose wether
you really need such a shadow quality!
|
Fine tuning your shadows
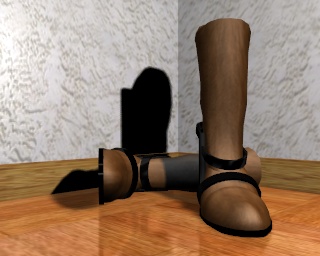
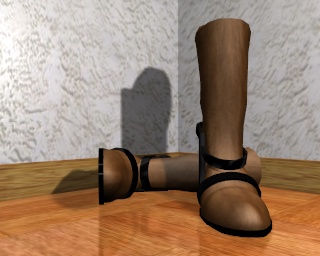
"Only Shadow" button and
"Energy" value
So far, we used our Spot to cast both light
and shadow. This is why in our latest renderings, we can see the spot light
on the floor and on the walls. Most of the time, this isn't the effect
you want to achieve. Instead, you would like to dissociate shadows from
the light source. This is easily done : set a few Lamps, or Hemis, or Suns
(whatever you like) for your whole scene. Then add many Spot lamps (ideally,
one for each object for which you'd like to see a shadow, or at least one
for a group of close casting shadows objects) for which you turn the "Only
shadow" button along with the "Shadows" button. Et voilà ! Your
Spots only cast shadows and don't add to the luminosity of the scene !
Alas, the shadow deepness increases dramatically.
In order to compensate this, you can play with the Energy value of the
Spot. As a rule of thumb, a middle value gives almost the same result as
a Spot casting both light and shadows. But sometimes, you'll like it with
pitch dark shadows !
|
|
|
Lamp, Spot with "Only shadow" turned
on and Spot Energy set to 1.000
|
The same, but with Spot Energy set
to 0.500
|
"ClipSta" and "ClipEnd"
These two parameters set how light
and shadows are dealed with in the Spot vicinity. They are visualized by
a pink segment runing along the Spot direction, such as the example below
:
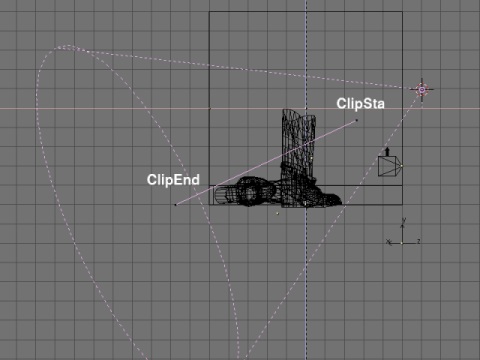
In fact, every face of any mesh closer
to the Spot than the ClipSta value always has light, and every face of
any mesh beyond the ClipEnd value always has shadows. Any face of any mesh
between these two current values has its pixels given a light or shadow
value according to the data stored into the shadow buffer.
There are two rules that you should follow
in order to always get the neater shadows :
-
Set the range between ClipSta and ClipEnd
the smallest possible.
-
Set ClipSta the highest possible.
Soft
This defines the size of the area being sampled
(see Samples, before). The highest the value, the smoother the borders
of the shadow become. In all the previous renderings, Soft was set to 3.00,
but here you wan see what become the pictures when set to higher or lower
values.
|
|
|
Zoom: BufSi 512, Soft 1.00
|
Zoom: BufSi 512, Soft 5.00
|

|
|
|
Zoom: BufSi 512, Soft 10.00
|
Zoom: BufSi 512, Soft 20.00
|
Using a low Soft value just like 3.00 is
perfect most of the time, and it should be used as default value whenever
appropriate. Higher values soften the borders to an extent that remind
lights emitted by large surfaces (just like white neons in supermarkets),
with according fuzzy shadows.
Bias
Some strange patterns appear sometimes in
the shadowy area, when Bias is set to a low value and when the range between
ClipSta and ClipEnd is low (as is usually recommanded). To prevent this,
you should always set Bias to the highest value possible.
|
|
|
Bias set to 0.01
|
Bias set to 1.00
|
 |
 |
|
Bias set to 3.00
|
Bias set to 5.00
|
The patterns are clearly visible when Bias
is set to 0.01 and are progressively smoothened when this parameter is
increased. It's hard to tell at all if there's a pattern in the rendering
with the Bias set to 3.00, but the picture seems to be a little darker
than the one with Bias set to 5.00. Confused? Nevermind! Set Bias to 5.00
without even thinking about it!
Final conclusion
You are now deeply familiar with casting shadows
within Blender. Given time, you will play with light and shadow concepts
without even thinking about it, and enhance the quality and realism of
your pics by 100%. But before that, stay simple and straight-forward:
-
Try to set all your SpotSi within 45.00 and
60.00 degrees values, avoid setting them above 90 degrees
-
Set Samples to 5
-
Try to set BufSi to 768 or 1024
-
Set the range between ClipSta and ClipEnd
the smallest possible
-
Set ClipSta the highest possible
-
Set Soft to 3.00
-
Set Bias to 5.00
Happy blending!